A guide to using prompts in Uizard

Looking to create a multi-screen prototype from just a few lines of text? Or maybe you want to add another screen to your Uizard design but are in need of some inspiration? Uizard Autodesigner offers a multitude of AI-powered, prompt-fuelled capabilities.
From whole prototypes to single screens, images and themes, simple text prompts fuel endless design possibilities in Uizard. In this article you will learn where you can use prompts in Uizard, as well as everything you need to know to get started with Autodesigner. With helpful prompt examples along the way, you will be a prompt expert in no time.
Skip to section:
Create a multi-screen prototype using prompts
Create a single screen using prompts
Using prompts for image and theme generation
Create a multi-screen prototype using prompts
With Uizard Autodesigner you can generate multi-screen prototypes using prompts and keywords. Powered by AI, Autodesigner uses your prompts to create multiple design screens consisting of elements and components relevant to your prompt, as well as a fully mapped user flow.
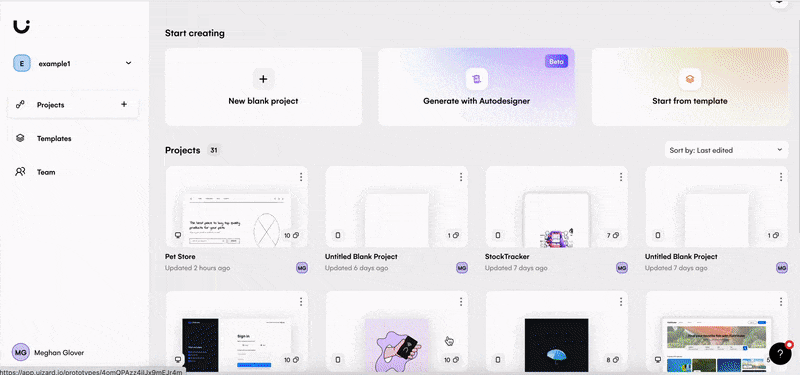
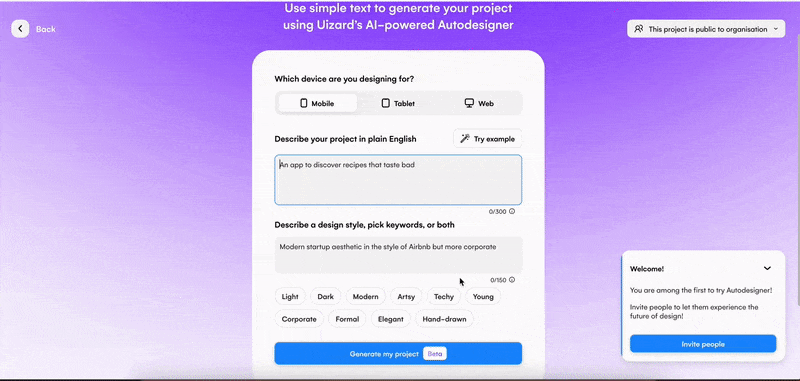
To get started with Autodesigner, make sure that you’ve signed up to Uizard Pro and have logged into your account. On the project dashboard page, select the Autodesigner option under the heading ‘Start creating’.
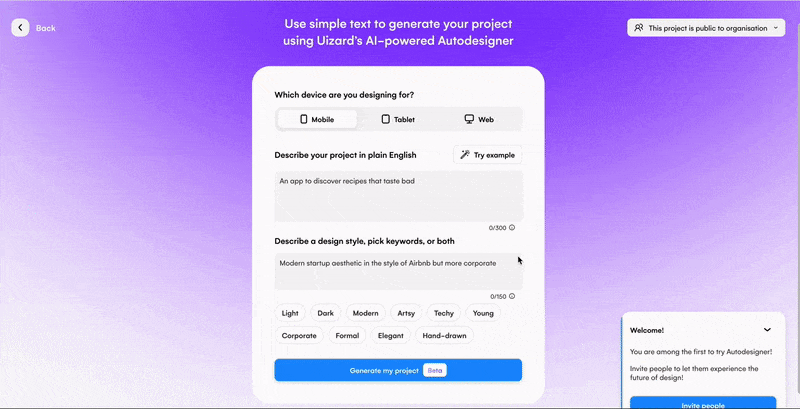
From here you can input two prompts, one describing your project and the other describing your design style. Supplement these two prompts with extra keywords, or leave the second prompt and just use the keywords. You will find that the more detailed your prompts are, the better your results will be.
Starting a design project with Autodesigner’s prototype generation gives you a head start, whilst still allowing you full creative freedom over editing and expanding your UI design. Try out our AI UI generator on a Free account with two attempts, or endless attempts on a Pro account!
Prompt examples for creating a multi-screen prototype
The prompts you decide to use to create your prototype with Autodesigner will impact the results you get. It’s important to describe exactly what you want from a project, all the way down to the design style. The next three sections run through some examples of the types of prompts you could use, and their outputs.
Prompt example one
When starting a project with Autodesigner’s prototype generation, you can be as specific or non-descript as you would like. In this example, the prompts that were used are as follows:
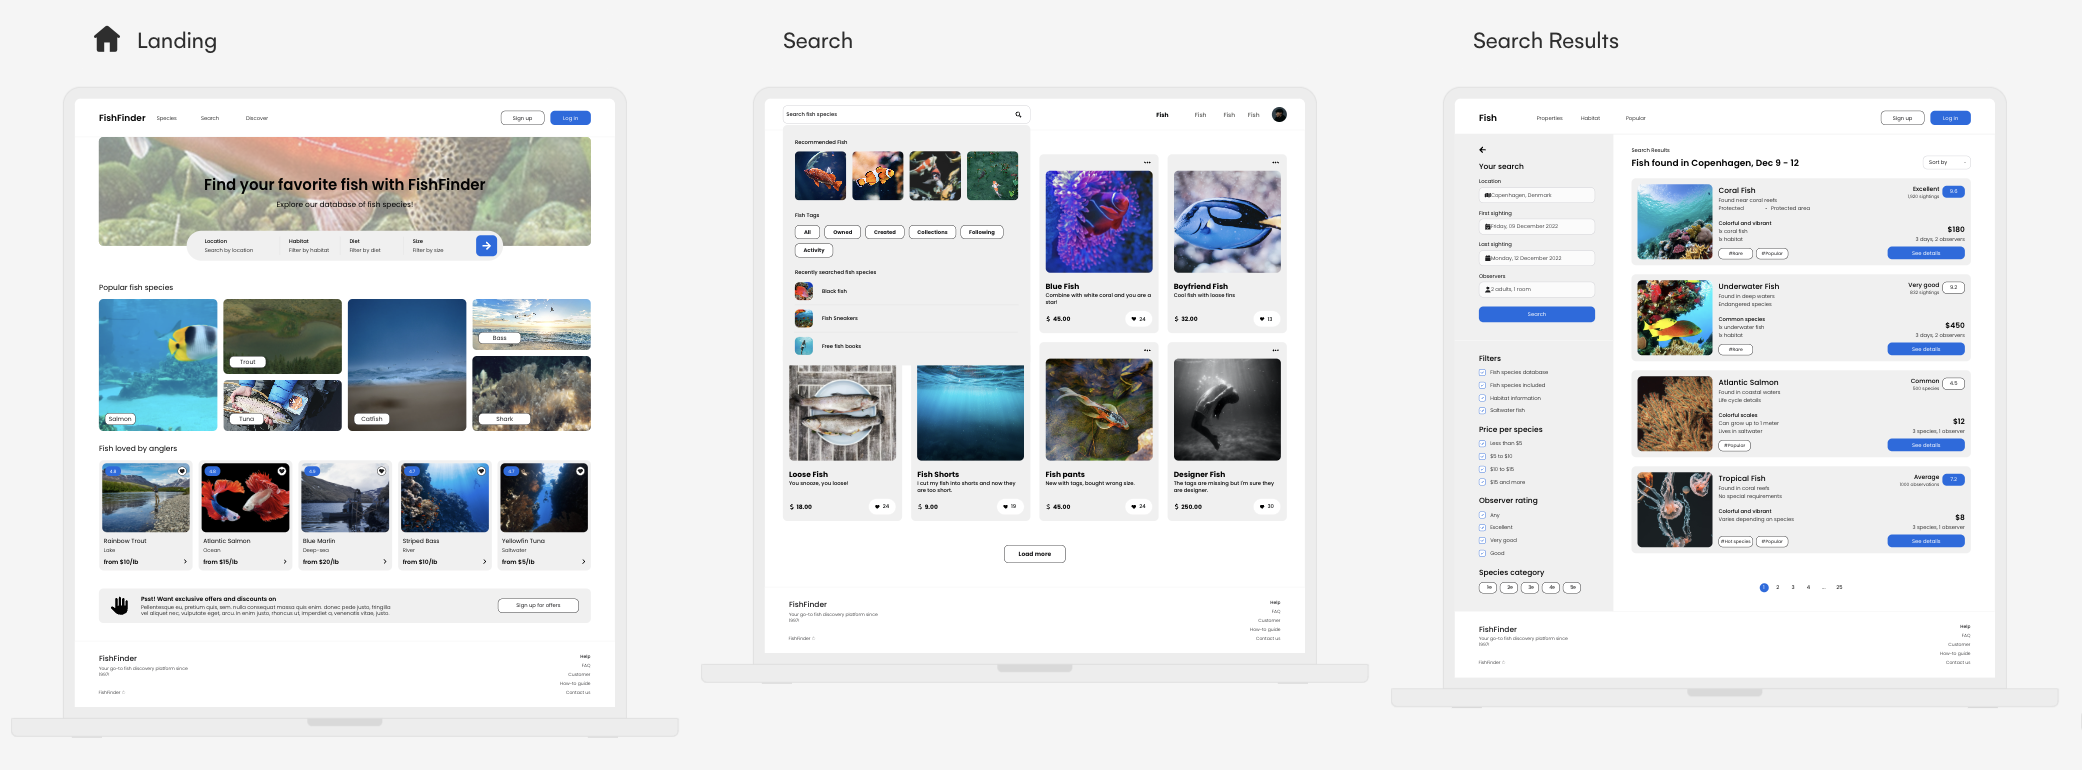
Description: ‘A website for discovering species of fish’
Design style: ‘Blue buttons, clean aesthetic’
From these simple text prompts, Autodesigner generated a five screen prototype complete with fish related content and images, as well as a clean aesthetic with blue buttons. A perfect starting point for someone looking to create a fish discovery website.
Prompt example two
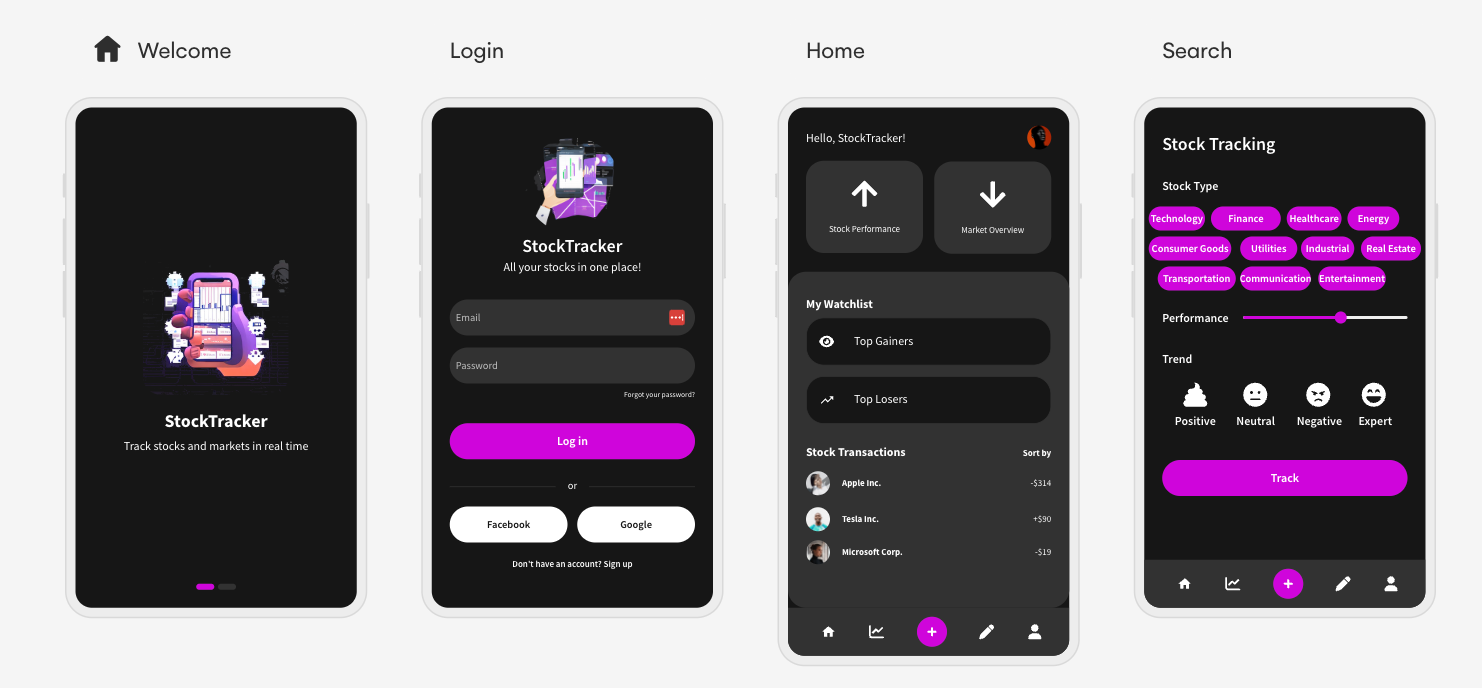
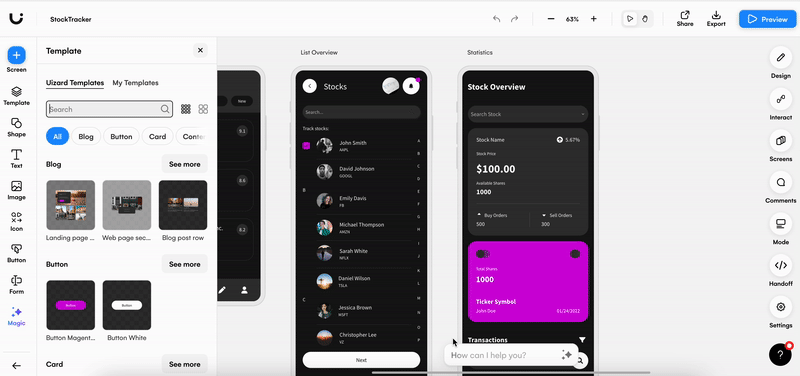
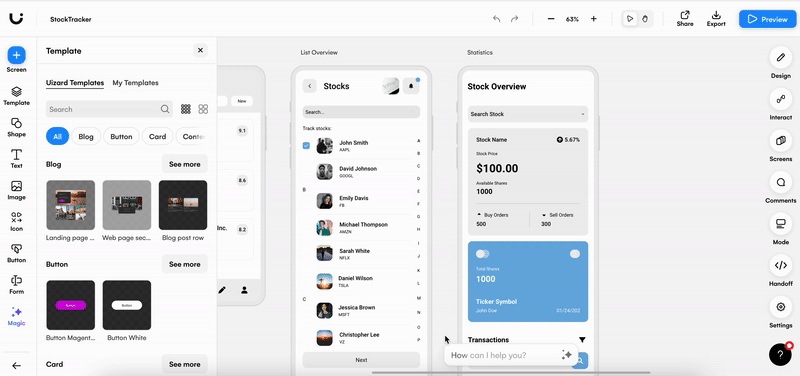
Autodesigner can tailor content, images and types of screens to the prompts that you use. For a stocks app design, you may want to use the prompts below:
Description: ‘A stocks app for tracking markets’
Design style: ‘Cyberpunk, dark’
In this seven screen prototype, a dark theme was specified so the design screens are completely black — matching the prompt. There are also relevant screens such as a stock overview screen, a login and welcome page, and many more. This provides a great base to start designing and adapting a stocks app design in Uizard.
Prompt example three
Feeling stumped for inspiration? The ‘Try example’ button is the perfect option for when creativity doesn’t strike. Using this option, there will be various prompts that you can test out, such as:
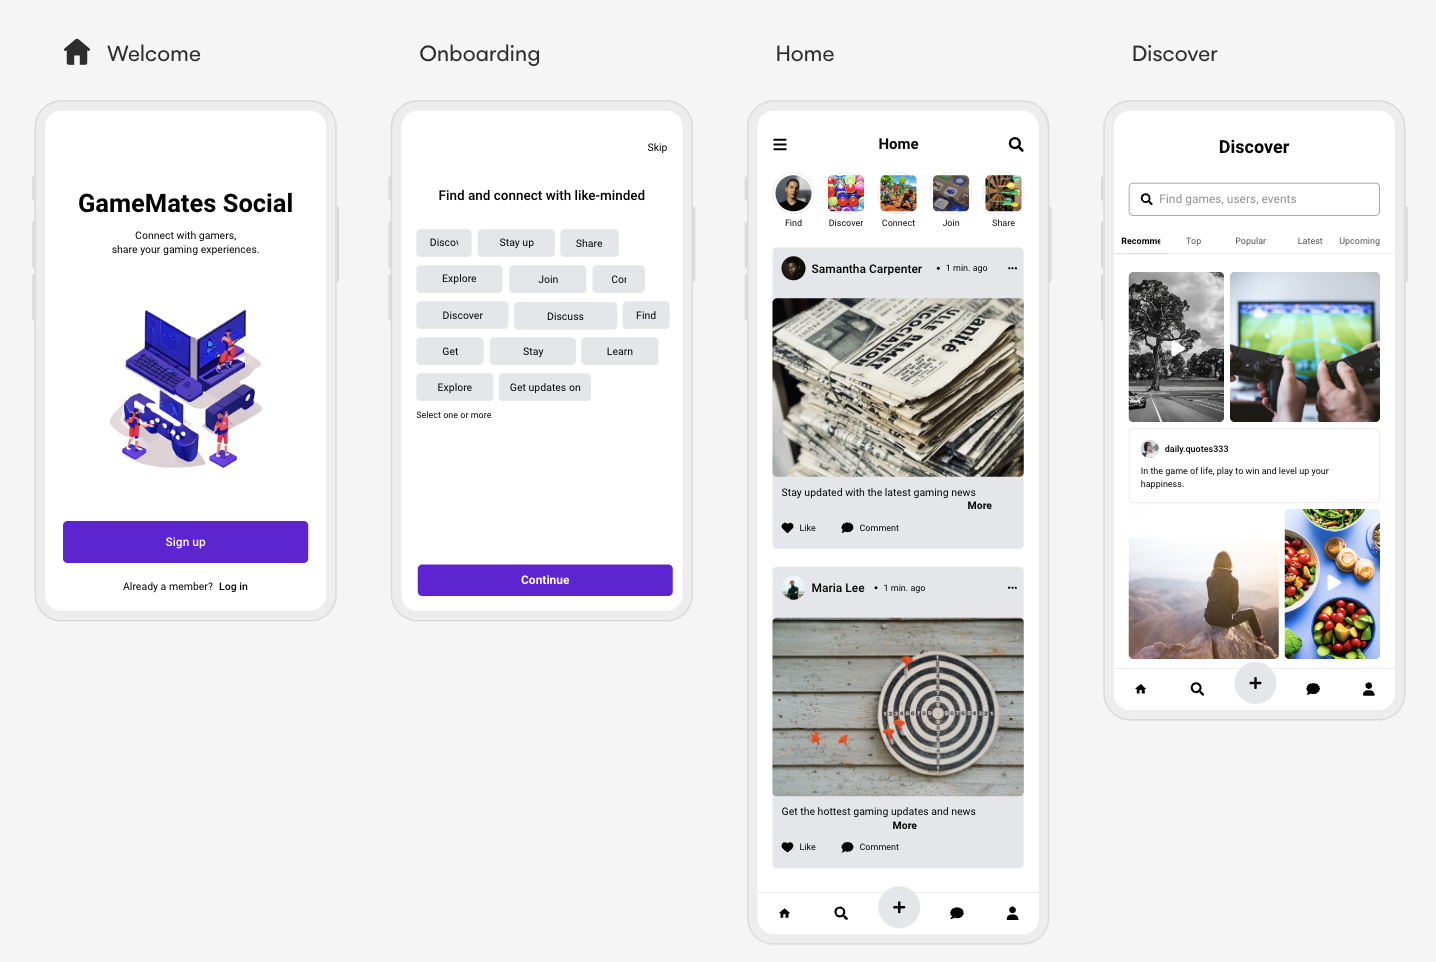
Description: ‘A social media app for gamers’
Design style: ‘Like Facebook but purple’
Using this button, these prompts generated a seven screen prototype, in the form of a social media app design but for gamers. The Facebook blue was replaced with purple, as specified in the prompt, and multiple on-topic screens were generated.
Create a single screen using prompts
Whether you’re starting from scratch, using a UI design template or have already created a prototype with Autodesigner, you can easily complement and expand your Uizard project with an AI generated single screen.
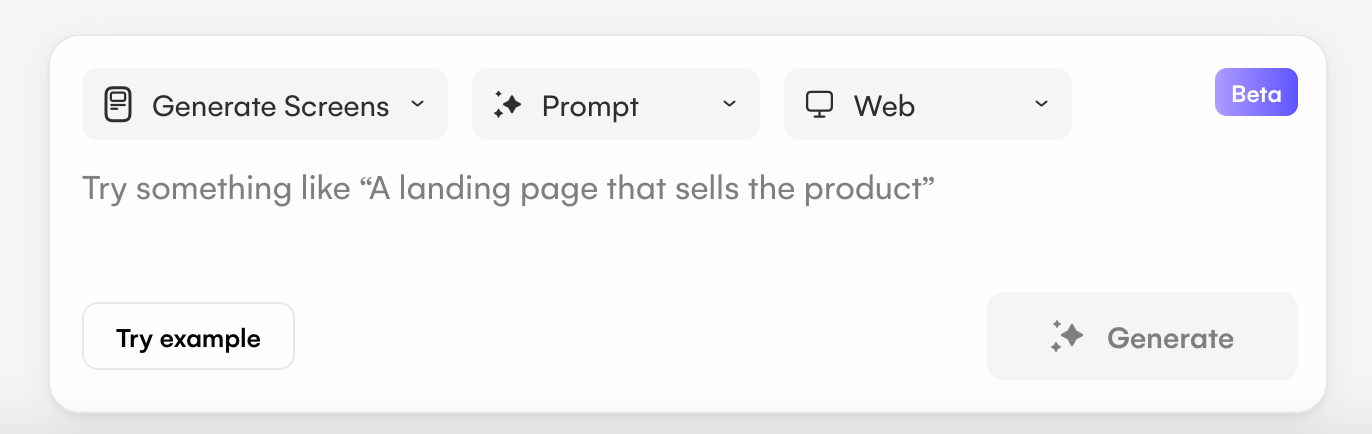
With Uizard Autodesigner 1.5 you can generate a single screen from a text prompt. To get started, use the Autodesigner widget at the bottom of your screen.

From here, select the prompt option on the left, and you can then enter your prompt in the pop up box that appears. The prompt you use should describe the screen that you want to be generated, for instance ‘A landing page that sells the product’ or ‘A cart screen where the products are inspired by the rest of the design’. Once your prompt is complete, click the generate button.
After a quick generation you will then be provided with several single screen options to flick through. Once you have found the one that you desire, you can either click directly on your chosen screen, opt for the ‘use screen’ button, or drag and drop the screen into position.
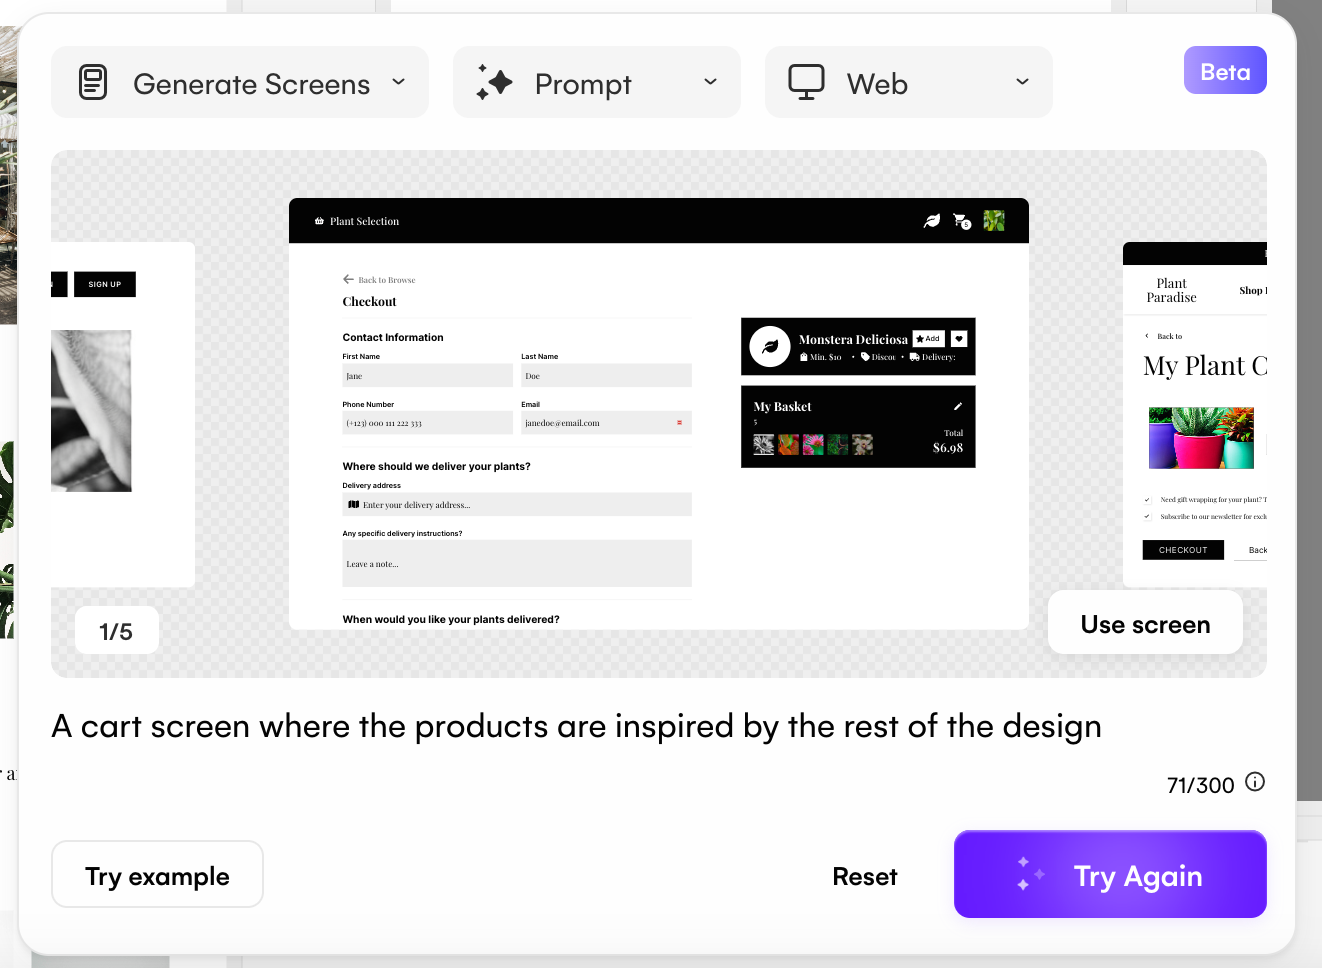
The screens you generate will remain at the bottom of the screen until you click reset. This means you have constant access to your generated single screens at any point throughout your project. However, if you exit your project your generated screens will reset automatically.
Prompt guidelines: Dos and don'ts for single screen generation
In order to make the most of Autodesigner’s single screen generator, there are a few dos and don’ts to keep in mind:
Do:
-
Specify a type of screen: This means specifying a sign up screen, a landing page or anything else that you want to add to your design.
-
Add extra context: If your UI design is a pet store app, and you want a screen solely about cat food, include this in your prompt. For example, ‘A product page selling cat food’ will tailor the screen generation to include images and content about cats.
-
Have fun and be creative: Most importantly, go wild with your prompts. See what you can generate that will make your UI design stand out from the rest. The screen generator has a multitude of capabilities, so make sure to try them out.
Don't:
-
Specify colors: The single screen generator cannot create a new design screen in a different color. However, it is easy to switch up the colors of your generated screen in the editor.
-
Describe multiple screens: The screen generator can only generate one type of screen at once. So if you use a prompt referring to two different screens, only one type will be generated.
-
Provide irrelevant context: When a single screen is generated, it will pull information from the rest of your project in order to customize the screen to your needs. If you include irrelevant or contradictory text in your prompt you won’t get the output you’re looking for. For instance, using the prompt ‘A product page selling cat food’, on a stocks app design will generate a screen combining cat food and stocks.
-
Mention a different device: If you’re designing a website, your single screen generator will naturally be set to ‘Web’ in the third dropdown box. If you specify a different device in your prompt, such as an app, the generator will ignore this and stick with the dropdown. So if you want a different device design screen, make sure to use the dropdown.
Prompt examples for single screen creation
For extra context on the types of prompts you can use to create a screen, below are some prompt possibilities and their single screen generations.
Prompt example one
Using even simple prompts can guarantee a screen that matches the theme and style of your design project. As seen below, the prompt ‘A signup page’ is used to create several single screens, each perfectly matching the dark theme of the weather app design project.
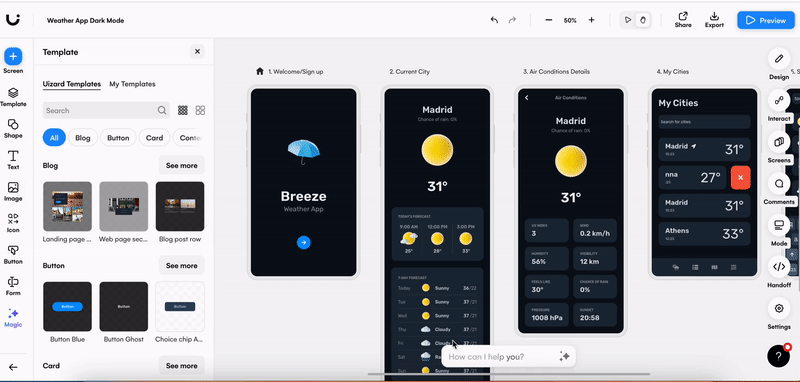
The AI generated options can then be flicked through using the arrows on either side of the preview screen. If you decide that you want to make your prompt more specific, you can easily reset or edit your prompt directly and select ‘Try Again’ to generate new screens to pick from.
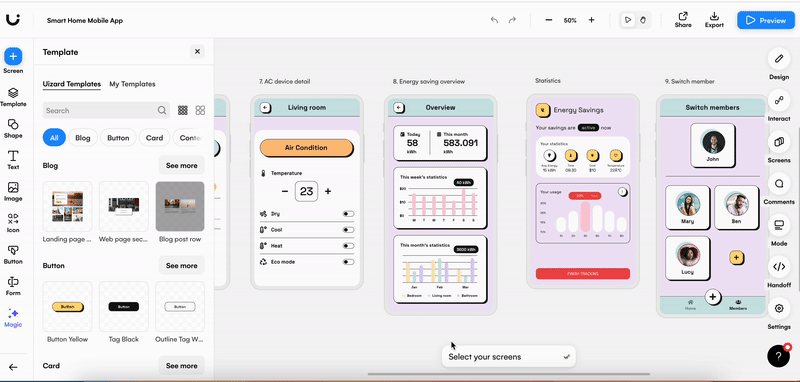
Prompt example two
With Autodesigner 1.5 single screen creation, your prompts can be as specific as you like. In this example, the prompt ‘A dashboard overview of energy savings’ was used. This prompt matched the purpose of the prototype perfectly, and even included helpful energy graphs, as well as keeping a consistent color scheme.
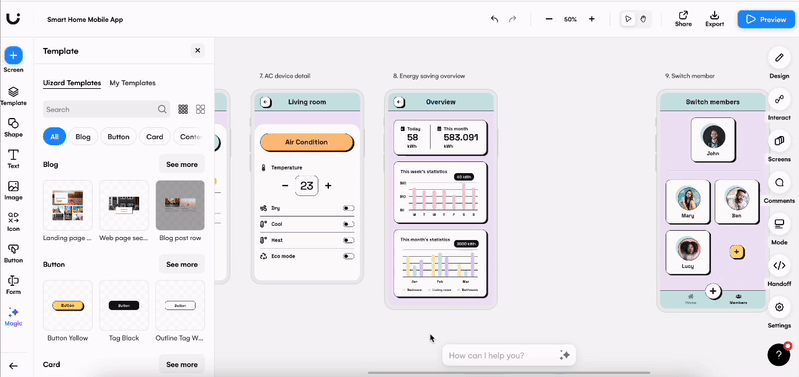
There is no easier way to develop and expand your project than using Autodesigner 1.5 to add more screens to your UI design.
Prompt example three
Much like generating a whole prototype with Autodesigner, you also have the option to use the ‘Try example’ button when generating a single screen. This is extremely useful when testing out what Autodesigner 1.5 has to offer, as well as learning the sorts of prompts you may want to use.
From the example options, the prompt ‘Generate a screen to showcase the statistics of profile visits’ is used.
With several single screen options, you can easily find one that suits your design screen needs. And it couldn’t be simpler to edit your new screen using the drag-and-drop editor if you wish to.
Using prompts for image and theme generation
Autodesigner 1.5 does more than just screen generation. It is now home to both the Image Generator and Theme Generator too.
Generate a UI design theme from a prompt
Apply a theme to your entire UI design using just a text prompt with Uizard Theme Generator. Located in the same spot as the screen and image generators, switch up the color scheme of your project quickly and easily.
All you have to do is select the Autodesigner 1.5 widget at the bottom of your screen, and opt for the ‘Generate Theme’ option from the left dropdown menu. A range of Theme Generator options will appear, but you will want to click the prompt button.
Now the fun starts. Enter your theme prompt into the space provided, and you can supplement your prompt with keywords if you desire too. Selecting the ‘Generate’ button will create your theme, and allow you to preview it on your project before clicking ‘Apply’.
Try out Theme Generator on a Free account for five attempts, or use as many times as you would like on a Uizard Pro account.
Generate images from text prompts
Using the power of AI, you can generate your own images. Located in the same spot as the Theme Generator, all you have to do is click the Image Generator option from the left dropdown menu.
From here you can input a prompt to describe your desired image, as well as choose from a variety of image styles, such as photo, illustration, 3D and more, to really make your image your own.
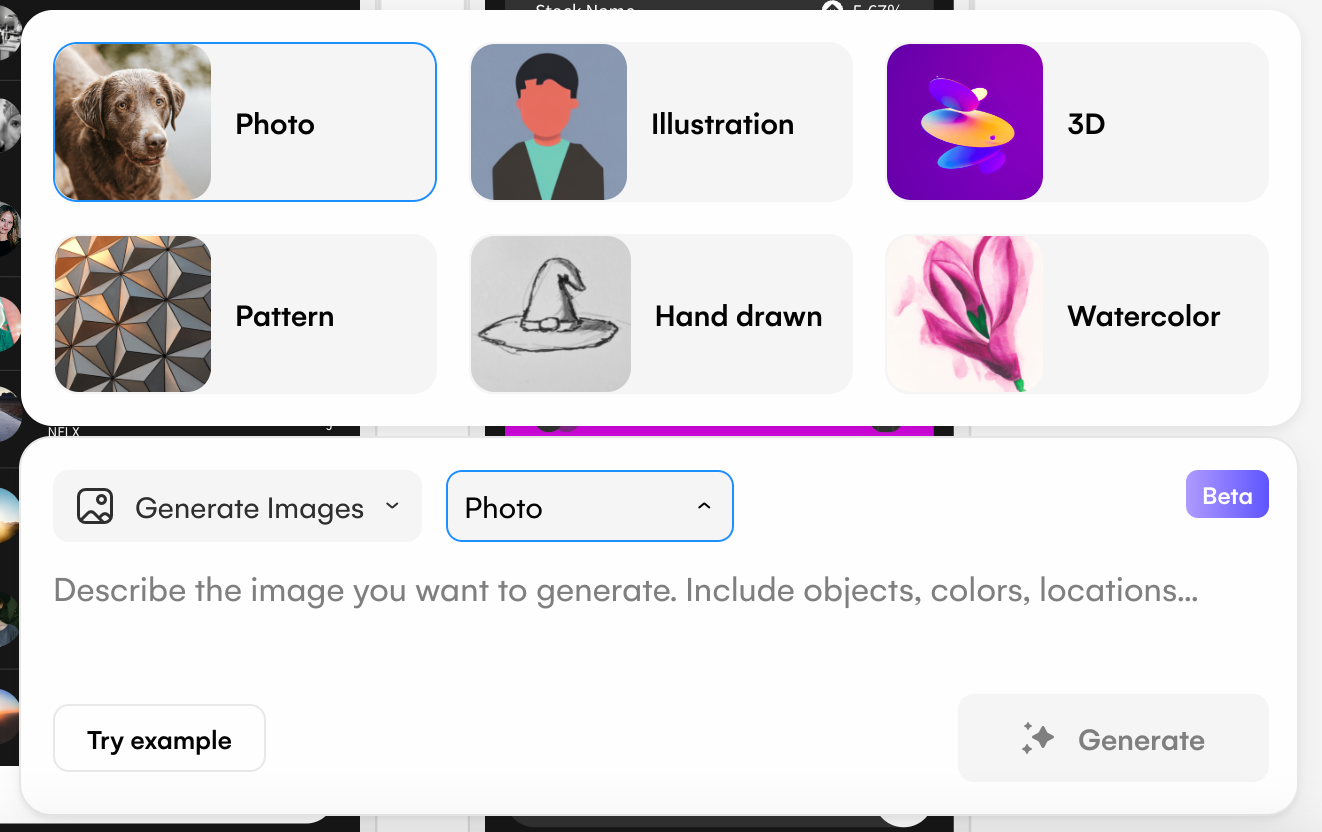
Once you have generated your desired image, there are four options available to pick from. You can easily drag-and-drop your images onto the screen of your choice. Much like single screen generation, once clicking off of the bottom bar your images will remain there until you decide to reset, or exit your project. Keep your UI design unique, and generate images in Uizard.
Try the Image Generator out for yourself, with five attempts on a Free account or limitless attempts on a Uizard Pro account.
Check out our Autodesigner 1.5 walkthrough for more information on screen, theme, and image generation in Uizard:
UI AI design is made easy in Uizard. To get started on your very own prompt fuelled design journey, sign up to Uizard today. For more articles like this one, check out the Uizard blog.