Mobile app wireframing: A step-by-step guide

When it comes to transforming your mobile app vision into something more tangible, there’s no better way than sitting down with a pen or paper, gathering your team around a whiteboard, or mapping your app idea out with online wireframing software.
As we discussed in our beginner’s guide to wireframing, the beauty of app wireframing is that absolutely anyone can get involved and have a crack at it. If you are drawing your wireframes by hand, all you need to do is pick up a pen and get to work. That’s not to say there is no skill involved though. Sure, there is a low barrier to entry, but there’s more to perfecting your design than just scribbling a few boxes down on a piece of paper.
Looking to streamline the mobile app wireframe process like never before? Maybe you’re new to the world of wireframing and want some tips on how to turn your mobile app idea into a digital design? We cover everything in our step-by-step guide.
Skip to section:
What is a mobile app wireframe?
What does a mobile app wireframe actually include?
How to create a wireframe for an app: 6 steps for designing the best mobile app wireframe
How to create and edit app wireframes with Uizard
What is a mobile app wireframe?
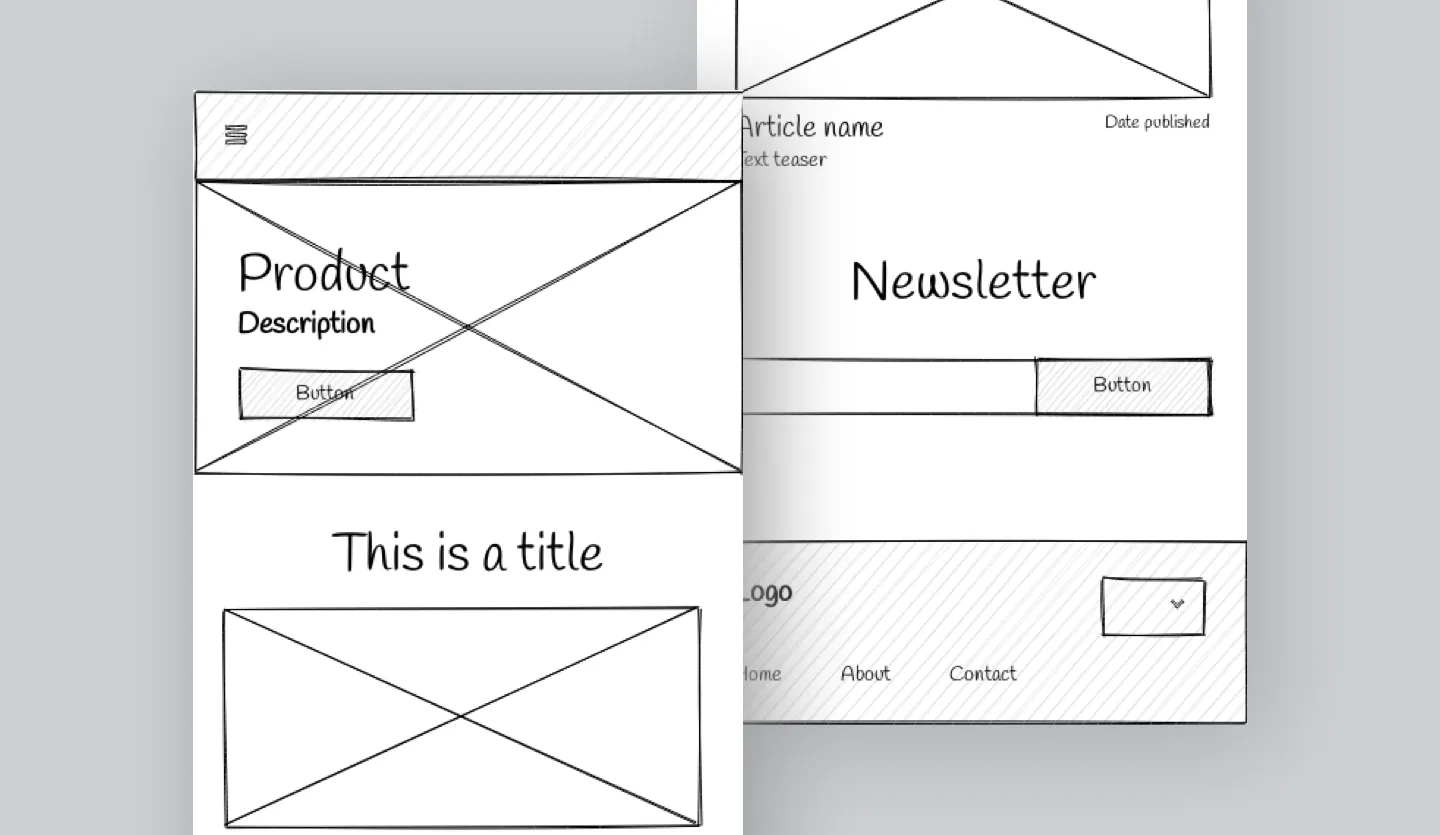
A mobile app wireframe is a sketch or digital visualization of a mobile app design that outlines how an application will function in terms of user flows, click journeys, and CTA placement. Mobile app wireframes are typically low-fidelity and so don’t include visual and stylistic elements or any branding, and also don’t include any copy aside from page titles and subheadings to demonstrate core page intent (you can find out more about wireframe fidelity in our dedicated guide).
What does a mobile app wireframe actually include?
Whether you are using a UI wireframing tool such as Uizard to map out your wireframe, or you're taking things back to basics with a good old fashioned, hand-drawn wireframe, what you need to include in your project will largely remain the same.
We cover this in more detail in our step-by-step guide below, but really, all your mobile wireframe designs need to include are the core elements and interactions to convey the overall purpose of your app idea i.e., what each screen will need in terms of basic elements and components, and how screens are linked together to demonstrate user journeys.
How to create a wireframe for an app: 6 steps for designing the best mobile app wireframe
Ready to get to work? If you have a mobile app idea in mind that you are itching to bring to life, here are six steps for creating the perfect mobile app wireframe…
- Identify what user journeys you want to cover
- Decide what screens/pages you need in your mobile app wireframe
- Map out your mobile wireframes in an intuitive order
- Populate each app wireframe with appropriate elements and components
- Link app wireframe pages through CTAs and navigational elements
- Share your mobile app wireframes and test your assumptions
1. Identify what user journeys you want to cover
Depending on the size of your app idea, there might be several user journeys you want to map out in your initial wireframe to really give an idea of what you are trying to achieve and why. Before you even begin to actually design or draw any screens or elements, try writing out your user flows in list format or as a flow chart so you can get a clear picture of what pages and elements you are going to need before you've even begun the design process.
2. Decide what screens/pages you need in your mobile app wireframe
Once you have your list of user flows, you can then start thinking about what screens you need to include in your early-stage wireframe design. For example, you might be designing a food delivery app that takes the user from order to basket. This particular user journey will have a limited number of conversional screens however, these will likely be supplemented by more foundational screens such as a homepage or a search screen.
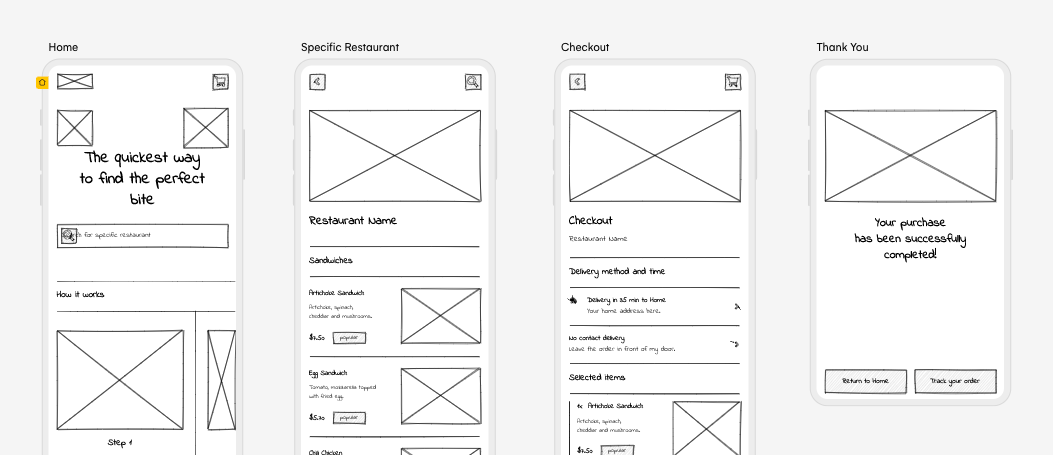
3. Map out your mobile wireframes in an intuitive order
The next step is to sketch out your screens in an intuitive order. This might again depend on what user flow you are trying to demonstrate, with most being fairly linear. If you are demonstrating a user journey that is cyclical or many user journeys that flow in different directions, then you might want to center your homepage screen with the various user journeys mapped out around it.
4. Populate each app wireframe with appropriate elements and components
Once you know which pages you need and what order you want them in, you can start populating them with various elements to demonstrate the purpose they fulfill within the scope of the wider design. There will be a number of elements that will remain consistent throughout each screen (such as navigational elements so your users don't get lost), but many pages will have their own unique elements.
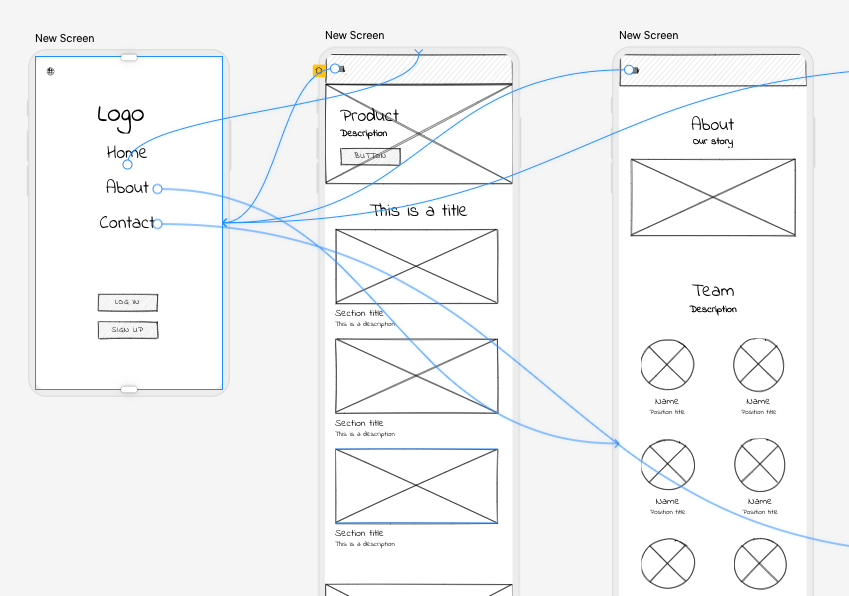
5. Link app wireframe pages through CTAs and navigational elements
CTAs and page interactions will really make your wireframe go from basic illustration to useful demonstration of how your product will actually function. If you are hand-drawing your wireframes, you can illustrate page interactions through a series of lines, sort of like a spider diagram.
If you are using an app wireframing tool such as Uizard to design your app however, you can actually link elements to other screens within your design and explore how the user flow would work using a dynamic preview. This will effortlessly transform your static wireframe design into a functional wireflow. To do so, simply select an element and use the lightning bolt icon to connect it to another design screen.
6. Share your mobile app wireframes and test your assumptions
Once you have populated all your screens with appropriate elements and added in your page interactions, you can then share your idea with various stakeholders for first-round feedback. With Uizard, you can even add people directly to your wireframe app project, meaning they are only one click away from seeing your brand-new design!
Having shared with your team, you can then look at adapting some user journeys or adding in additional screens based on feedback. You likely won't have hit all the necessary touch points the first time around, and collaboration can be a great way to develop ideas and improve the solutions your app idea provides.
How to create and edit app wireframes with Uizard
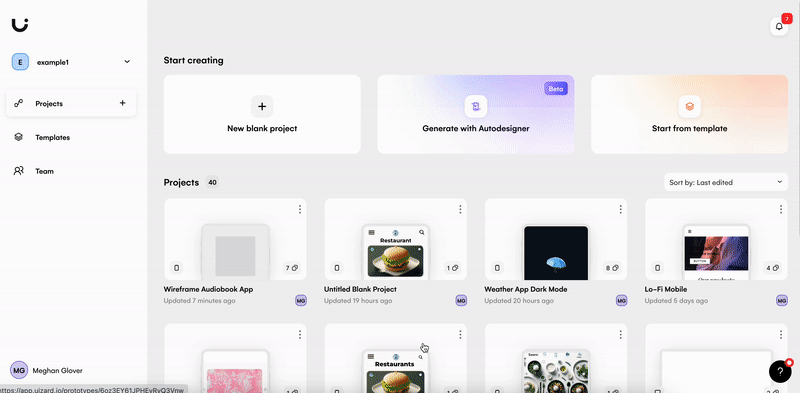
Using Uizard as your app wireframing tool, you have three possible opportunities to create mobile app wireframes. The option you pick will depend on how you want to start your wireframe project: from scratch, from a template or by uploading your own app wireframe sketches. Wireframing with Uizard is quick, simple, and will get your app wireframe project up and running in no time.
Upload app wireframe sketches to Uizard
With Uizard Wireframe, you can import an app wireframe sketch directly onto a design screen in the Uizard editor. All you have to do is snap a picture of your app wireframe drawing and upload it via the wireframe scanner located in the magic tab on the left panel in the editor. For a detailed look at this process, check out the blog ‘Uizard Wireframe Explained’ or watch the video walkthrough below.
Use a Uizard app wireframe template: Low and medium-fidelity
If you don’t want to draw your own app wireframe by hand, you can instead use a low-fidelity Uizard app wireframe template. From here you can edit the template to create various wireframe design screens, and once you’re finished, simply head to the magic tab and use wireframe mode to convert your mobile app wireframe screens into a mockup. Alternatively, start with a medium-fidelity app wireframe template for a further headstart with your mobile wireframe design.
Start from scratch: Create a digital app wireframe
Looking to create a digital app wireframe from scratch? By starting a blank project in Uizard, and switching wireframe mode on, you can do just that. You can then drag-and-drop premade components onto your design screen to start creating your app wireframe.
What comes next?
Uizard is here to take your app wireframe to the next level, but what comes after wireframing your mobile app design? Populating your app design screens with detailed images, text and colors will transform your app wireframe into a mockup, which you can also achieve by switching to high-fidelity via wireframe mode in the Uizard editor. If you’re interested in how Uizard can help you go from wireframe to mockup, check out the article ‘How to create an app mockup’ for more information.
Uizard is an AI-powered design tool for non-designers, helping users to map out their designs and advance them to functional prototype designs. Sign up to Uizard for free today and bring your idea to life in magical high fidelity.