How to create an app mockup

Once you've had a great idea for an app, there’s nothing quite like bringing it to life on a screen in front of you in mockup form. Not only does creating an app mockup help you to visualize your product, its USPs, and its core user journeys, but it also helps to demonstrate to stakeholders why your product idea is so special.
More than that though, a solid app mockup can also be great for testing ideas, spotting inconsistencies within your product, and analyzing whether your design has the potential to deliver value to your target audience. Create app mockups at speed and you might even end up saving a lot of design and development time later down the line.
Not sure where to start when it comes to app design? In this guide, we talk you through how to create app mockups, how Uizard can help you create/design rapidly and collaboratively, and what comes after the mockup process.
App design with Uizard
Skip to section:
What is the best software for app mockups?
How to create a mockup of an app (in 5 easy steps)
How to use Uizard to create an app mockup
What is an app mockup?
An app mockup is a visualization of an app idea that is created to convey the overall structure, the core purpose, and the aesthetic of an app. The key distinction between an app mockup and a wireframe is that a mockup typically contains some (or all) of the visual elements that the finished product will include (e.g., text, imagery, branding). Mockups also tend to be non-functional, meaning they do not include clickable links and navigable user flows.
Once you add clickable links to your design, you are really dealing with an app prototype. To find out more about the distinction between the different levels of fidelity, you can check out our guide to app wireframing or our article on how to prototype an app.
Why create app mockups?
So, why create a mockup of your app idea in the first place? App mockups can be an extremely time and resource-efficient way to test ideas and refine concepts. Following the recent rise of user-friendly mockup tools, the process of creating app mockups is now faster than ever before. Here are some other reasons why utilizing app mockups might lead to great outcomes for your design project:
Gain valuable feedback on the feasibility of your design
One of the main issues of app design is you never really know whether your idea will work or not. Creating a mobile app mockup allows you to see what your app might look like in the hand of a user. You can review your core screens, analyze what the main user journeys might look like, and you can even assess the impact and effectiveness of your USPs and mission statement.
Expedite design sign-off by stakeholders
Another fantastic benefit of app mockups is that you can convey the core purpose and visual style of your app idea with minimal resources. This enables you to demonstrate your idea to team members, clients, or investors and get sign-off as soon as possible. Not only is this a great way to align everyone's expectations, but it can also reduce the time needed for sign-off during early-stage development.
Reduce development time on your app
Utilizing app mockups allows you to spot potential issues with your design much sooner than you usually would. Perhaps more importantly though, it also allows you to refine aspects of your idea before you even reach the development stage.
Where traditionally you might see various issues in early-stage development as a result of poor communication or due to a general misunderstanding of ideas, creating a mockup of an app with stakeholder sign-off will ensure you are providing your developer with as much information as possible, saving countless hours on project management and iteration later down the line.
What is the best software for app mockups?
The app mockup software you use for your app design will largely depend on the level of experience you have within the design sphere. The majority of mockup tools on the market are more suited to experienced designers who are comfortable with advanced design tasks and project management. However, more recently, a swathe of accessible, easy-to-use tools have emerged to support the democratization of design.
The beauty of rapid, user-friendly mockup tools, like Uizard, is that anyone and everyone can use them to bring an app idea to life in various levels of fidelity. Uizard empowers you to transform hand-drawn mockups into digital designs with the power of AI, and it supports you to add workable user journeys to your project with no design experience. You can even fast-track your design project by starting with one of our premade UI templates!
How to create a mockup of an app (in 5 easy steps)
You're clued up on what a mockup is, you've signed up to Uizard for free to help you bring your idea to life as quickly as possible, but what comes next? Here's how to create an app mockup in 5 easy steps:
- Start with your information architecture
- Map out your core pages in app wireframe form
- Digitize your app wireframes with Uizard Wireframe
- Embellish your designs with images, text, and core CTAs
- Centralize your USPs and add your user journeys
Step 1: Information architecture
First things first, there's more to an app mockup than a single landing page calling out your product's USP. If you really want to convey the full purpose and potential of your idea, then you need to think about the bigger picture. What secondary screens should my app include? How will users navigate through my app? How do I retain users and build brand loyalty and advocacy?
To get your app mockup off to a great start, you first need to map out your information architecture. In layman's terms, outlining your architecture translates as defining the content and functionality of your app as well as how content and design components are intended to interact with each other.
Don't panic though, you don't need to do any extensive design work just yet. You can map out your site structure as a flow chart with just a pen and paper. Get this part right and creating your app wireframes in step 2 will be so much easier!
Step 2: Create app wireframes
Once you have your app architecture mapped out, you can then move on to the wireframing process. The goal here is to sketch out what your core screens will actually look like structurally (think of this as your app blueprint). We cover this in more detail in our guide to hand-drawn wireframes, but essentially, you want to sketch out each screen with a rough layout of the key elements including image blocks, navigation, headings etc.
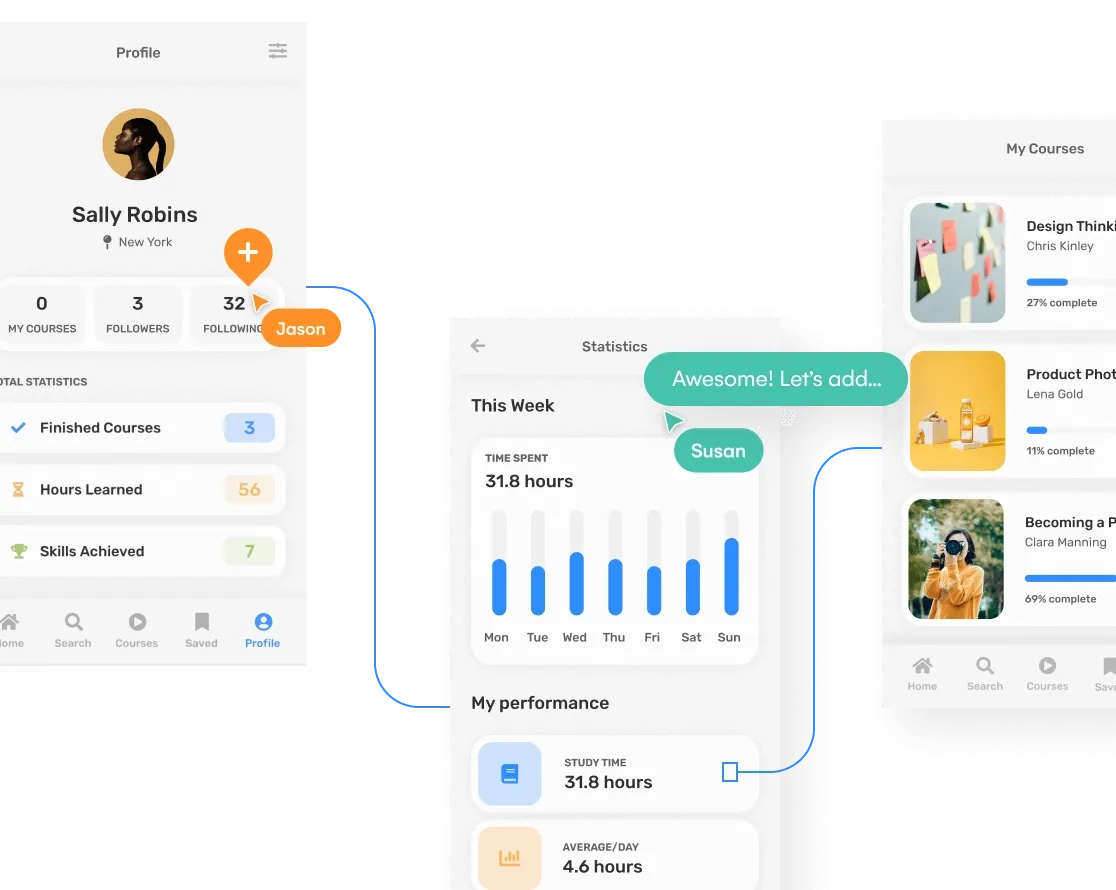
If you don't fancy hand-drawing your app wireframes, you can use our mobile app wireframe template in Uizard (pictured below) and then skip to step 4! To get started, sign up to Uizard for free and adapt it to your own design. Use Uizard as your wireframing tool and support your creative vision. You can even use AI-powered features to embellish your design... but more on that later.
Step 3: Digitize your wireframes with Uizard Wireframe
Finished sketching out your wireframes? Now comes the fun part. You can upload your drawings into Uizard and magically digitize them, all with the power of AI. Check out the video below for a brief overview of how that works in practice.
Step 4: Embellish your design with content
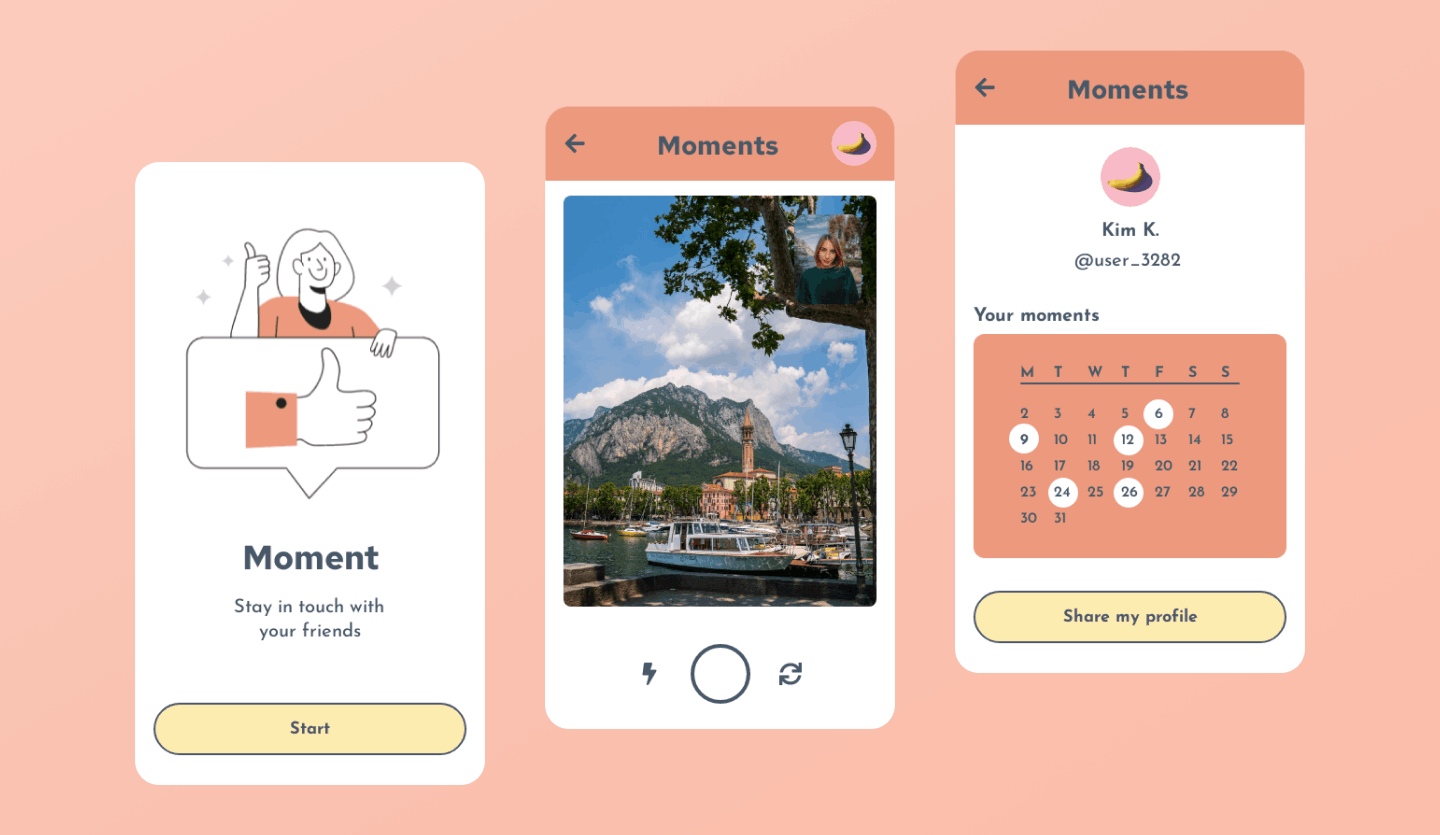
Once you have your wireframes digitized, you can now start adding flavor to your design. The goal here is to bring your app mockup to life so that you can demonstrate to stakeholders both internal and external what your vision is.
If your brand is established, then it's likely that you have brand guidelines that you need to stick to for the messaging and general aesthetic of your app mockup. If you are designing something brand-new, then you can get creative with Uizard's design components and stylization features until your app mockup looks just right.
If you are struggling to create written content for your pages, headings, or CTAs, Uizard's AI-powered features are here to help. Text Assistant does the hard work, so you don't have to.
Uizard's AI Text Assistant
Step 5: Review and add your user journeys
And finally, once you've mapped out your architecture, created your wireframes, and added in all your content, it's now time to map out your user journeys. At this stage, you don't necessarily need to add functional click journeys (although this is super easy to do in Uizard), instead, you can simply refine your CTA placement and navigational elements to demonstrate how each screen will interact.
If you do want to add functional elements to transform your mockup into a functional prototype, simply use Uizard's smart linking feature to point CTAs to their target pages... it's as easy as that!
How to use Uizard to create an app mockup
Whether you are designing a mobile app, a web app, or something for tablet, Uizard’s AI-powered features are here to make the design process as easy as possible. Let us run through a few ways to create an app mockup in Uizard.
Use an app design template
Possibly one of the easiest ways to create an app mockup in Uizard is to use one of our app design templates. Packed with several premade design screens, you have everything you need to get started on your next app mockup design quickly and efficiently.
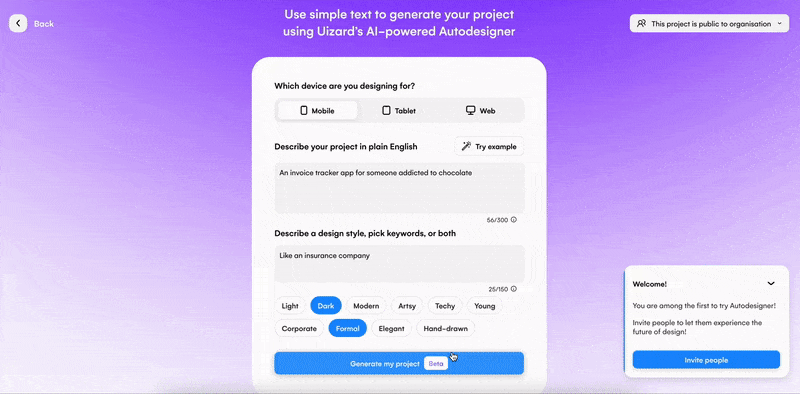
Generate an app mockup with Autodesigner
What could be easier than using a text prompt to generate an app design? With Autodesigner, you can do just that. Harness the power of AI and generate a multi-screen mockup that you are free to edit and personalize to suit your needs.
Start from scratch
When you want complete control over your app mockup, you can easily start from scratch by dragging and dropping premade UI components onto a blank design screen. Change the typography, colors and component styles in a few clicks, or create an entire new theme to apply to your app mockup using the Theme Generator. You’ll be surprised at how fast you can put together an app mockup in the Uizard editor.
Start from a screenshot
Have you seen an app design that has inspired you? Or maybe you want to create your next mockup based on one of your past product design projects? With Screenshot Scanner you can upload a screengrab of an image, and transform it into a new editable design screen! From inspirational app design to editable app mockup in no-time.
The best part of all? Uizard is completely free to use. Just sign up, start a new project, and bring your vision to life.
Want to find out more about the world of app design? Head over to the Uizard blog where we talk about everything from mobile app wireframing to the core fundamentals of ideation, iteration, and design philosophy.