The Uizard guide to wireframes

In its simplest terms, you can think of a wireframe as the blueprint of your website or app design. A wireframe illustrates the hierarchy of all of the basic elements on a screen: text, imagery, navigation, and calls-to-action. The job of a wireframe is to facilitate conversations and collaborations between product managers, designers, developers, and stakeholders, making sure everyone understands the idea the same way.
So, you’ve got an app or a website idea that you are sure is going to be a runaway success, but what comes next? Before you get overwhelmed with fancy design software or dive headfirst into premature conversations with a developer, the best place to start is with some simple wireframes to help you visualize and demonstrate your core concept.
With Uizard, you can take your wireframe sketch from paper to the screen, with the help of Wireframe Scanner — an AI-powered wireframe scanner. In this article we will run through what wireframes are, and how you can use wireframes in Uizard to get a project started, or to add to an existing one.
Skip to section:
What are wireframes in UI design?
What is a wireframe for a website?
What is a wireframe for an app?
- How to start a new project with wireframe sketches
- How to add a wireframe screen to an existing project
- Start with a Uizard wireframe template
- Use the UI components library to create a wireframe
What is a wireframe?
A wireframe is a schematic or blueprint of an app or web page, or a set of pages, that conveys the structure, layout, and placement of content, as well as the general intent and purpose of a design.
Wireframes can be created in several ways, typically though, they are often sketched by hand or created digitally. Check out the clickable example of a wireframe below to get a better understanding of the feel of a wireframe (you can navigate the wireframe via the clickable links in yellow).
What are wireframes in UI design?
Wireframing is one of the most important steps when designing apps, websites, or UI systems. A wireframe is a two-dimensional diagrammatic representation of a web page, app, or site that helps to demonstrate the core structure and functionality of a design or concept. Wireframes typically contain placeholder text and imagery, which allows the creator to demonstrate to developers, team members, and stakeholders the purpose and intent of a concept.
A wireframe illustrates the hierarchy of all of the basic elements on a screen: text, imagery, navigation, and calls-to-action. Pretty straightforward, right? Almost.
Wireframes can vary depending on both device type and the level of detail required in your design. To truly get to grips with wireframes and the surrounding terminology, it is important to understand the different types of wireframe as well as the varying degrees of wireframe fidelity.
What is a wireframe for a website?
The most common form of wireframe you will likely encounter is a website wireframe in desktop aspect ratio. A website wireframe is essentially a blueprint of a website or webpage that is designed to demonstrate core functionality. Unlike a mockup, a website wireframe has no graphical elements or text and typically uses placeholders instead. A wireframe for a desktop website will usually be presented in the standard desktop aspect ratio (16:9).
What is a wireframe for an app?
App wireframes, like website wireframes, function as a schematic to demonstrate the core structure and functionality of an app design. Although the presentation is similar to website wireframes (with placeholder images and text, and links between wireframe pages), app wireframes differ greatly in how they demonstrate user journeys.
It’s worth remembering the distinction between an app wireframe and a mobile website wireframe here. Apps are downloaded directly to a handheld device, whereas mobile websites are responsive versions of browser-based desktop sites.
Wireframes and fidelity
With wireframes, the concept of fidelity (the extent of design detail included, e.g., color, typography, imagery) is instrumental to serving your design objective during the design process. What type of device you are designing for is also relevant, with screen resolution and UI considerations differing between device types.
Low-fidelity wireframes
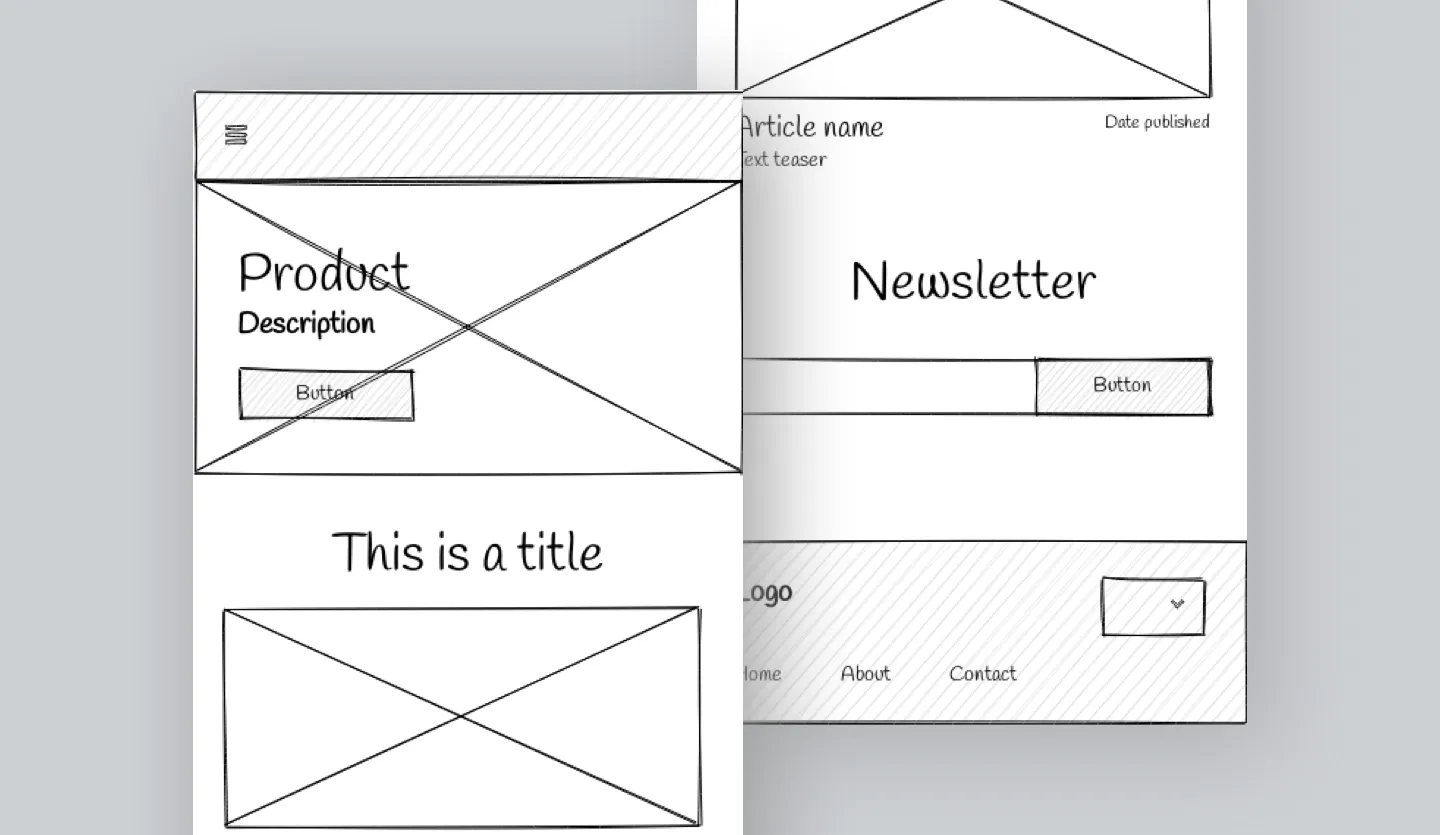
Low-fidelity wireframes are basic layouts of what content goes where and how pages relate to one another. Low-fi wireframes are commonly illustrated as whiteboard sketches or grayscale renderings and are seen as a starting point whilst wider concepts are being built-out.
Mid fidelity wireframes
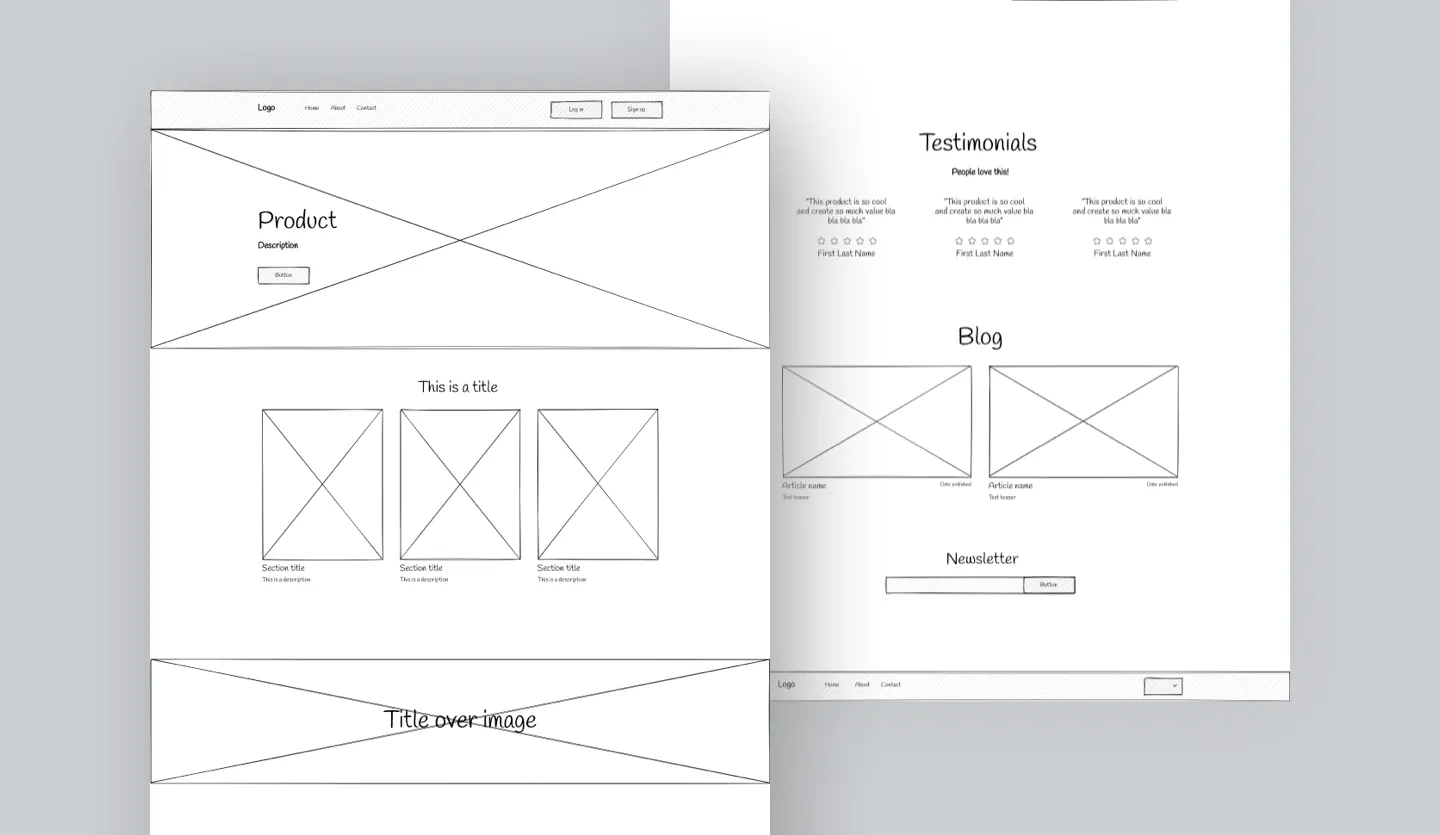
Mid fidelity wireframes present a more accurate representation of each page’s content hierarchy, positioning and flow of calls-to-action, and proportional placements of key interface elements. They include placeholder imagery, iconography, and lorem ipsum text. Medium fidelity wireframes show your idea in the development stage and reflect input from users, team members, and stakeholders gathered throughout testing and iteration.
High-fidelity wireframes
High-fidelity wireframes tend to be known as design mockups because their primary function is to illustrate a visual design direction. They are polished to include branding, imagery, and representative copy to give a sense of the final product.
Sometimes, hi-fi wireframes are produced early in a design process to dazzle stakeholders, but this can be a slippery slope of over-promising and under-delivering if the user experience side of things hasn't been properly worked out.
Why use wireframes?
Easy-to-use design tools (like Uizard) have become increasingly sophisticated. It is now possible to cut out steps of the process and move straight to stunningly designed mockups or prototypes. In fact, we provide a whole host of mobile app UI templates and web UI templates to allow you to do just that!
This doesn’t mean that the days of wireframing are over though. Essentially, it all comes down to the needs of the individual. If you are a founder wanting to get your concept off the ground as quickly as possible, a UI design template is perfect for you. If you are a project manager or a client manager in an agency, for example, you may be creating a complex structure that requires sign-off from multiple stakeholders. You may even be part of a team that has just mocked up an entire website on a whiteboard!
What we’re trying to say is… it really depends on the scope of your project. On a traditional design team, wireframes are typically the domain of UX designers, but more and more, non-designers are getting involved with the early design process to help ensure that the digital solution being built is coherent and aligned with the needs of the end-user.
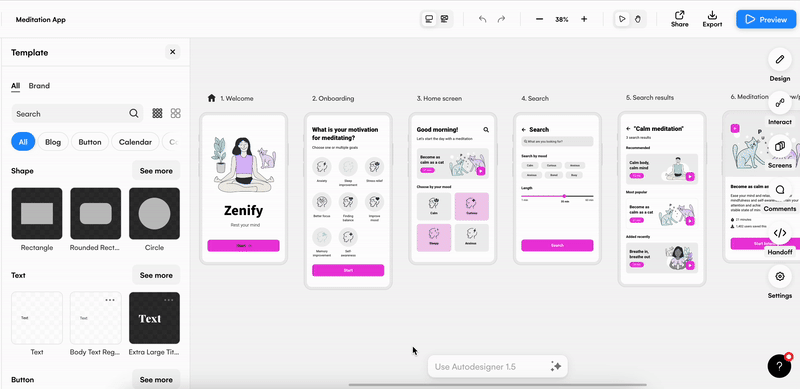
How to wireframe in Uizard
There are multiple ways you can wireframe in Uizard:
Start a new project with Uizard Wireframe: Kick-off a blank project with Uizard Wireframe, and turn your hand-drawn wireframe sketches into editable design screens in no-time at all.
Expand an existing project: Expand an existing Uizard project or UI template by importing a wireframe sketch.
Choose a Uizard wireframe template: You can also use a premade wireframe template to get started on your Uizard project straight away.
Use Uizard's UI components library: In wireframe mode, you can design wireframes easily using Uizard's components library.
In the following sections we will take you through each of these options, and then you can pick which one suits your wireframing needs.
How to start a new project with wireframe sketches
Let us run through how to get started with Uizard Wireframe in a blank project. It’s quick and easy.
1. Setting up your Uizard account
Before you learn how to create wireframes with Uizard, you will first need to create an account. Getting started with Uizard is easy. All you have to do is sign up and complete the onboarding questions. For extra information on this process, follow the helpful video below.
2. Define your goal, audience, and level of fidelity
Before you even open Uizard to start creating UX wireframes, you need to define your goal, audience, and level of fidelity so that your efforts are aligned with your objectives. By doing so, you’ll be able to decide how much time you should put into creating wireframes at this stage of your design process.
Goal: First, think about what you’re trying to achieve with your wireframes. Are they for testing out a new idea? For sharing suggested updates to an existing screen or flow? What’s the feedback you’ll need in order to move forward?
Audience: Since wireframes are a conversation tool, think about who you’ll be talking to. Be specific with what you’re asking from your audience, and tailor your approach to get the right input from the right people. A conversation with your dev team will likely generate different questions and insights than one with your user interface (UI) designer.
Level of fidelity: By level of fidelity, we mean determine how detailed your final wireframe should be. Think about where you want your audience to focus their feedback. Low-fidelity wireframes are best when your aim is gaining buy-in on the “big idea” or when you want to keep attention on a particular feature. Higher-fidelity wireframes will garner feedback on copywriting, look, and feel. Decide what’s essential to convey your goal at this point, and eliminate any distractions (you can find out more about fidelity in our wireframe fidelity guide).
Odds are you’ve already been thinking about these things as you’ve been developing your idea. Answering these three questions shouldn’t take too long, but it will set you up for success as you iterate your way forward.
3. Sketch out your wireframes
Now it’s time to get started on your wireframe sketches. If you need some help drawing your wireframes, take a look at our ‘How to draw wireframes’ article to kick-off the process. As these wireframes will be uploaded, and used in the Uizard editor, it’s important to check Uizard’s sketching guide to make sure your designs will render properly. This will ensure that you have the smoothest possible journey in Uizard.
Tip: For every wireframe sketch, snap an individual photo. This will help with the next step.
4. Upload your wireframe sketches to Uizard
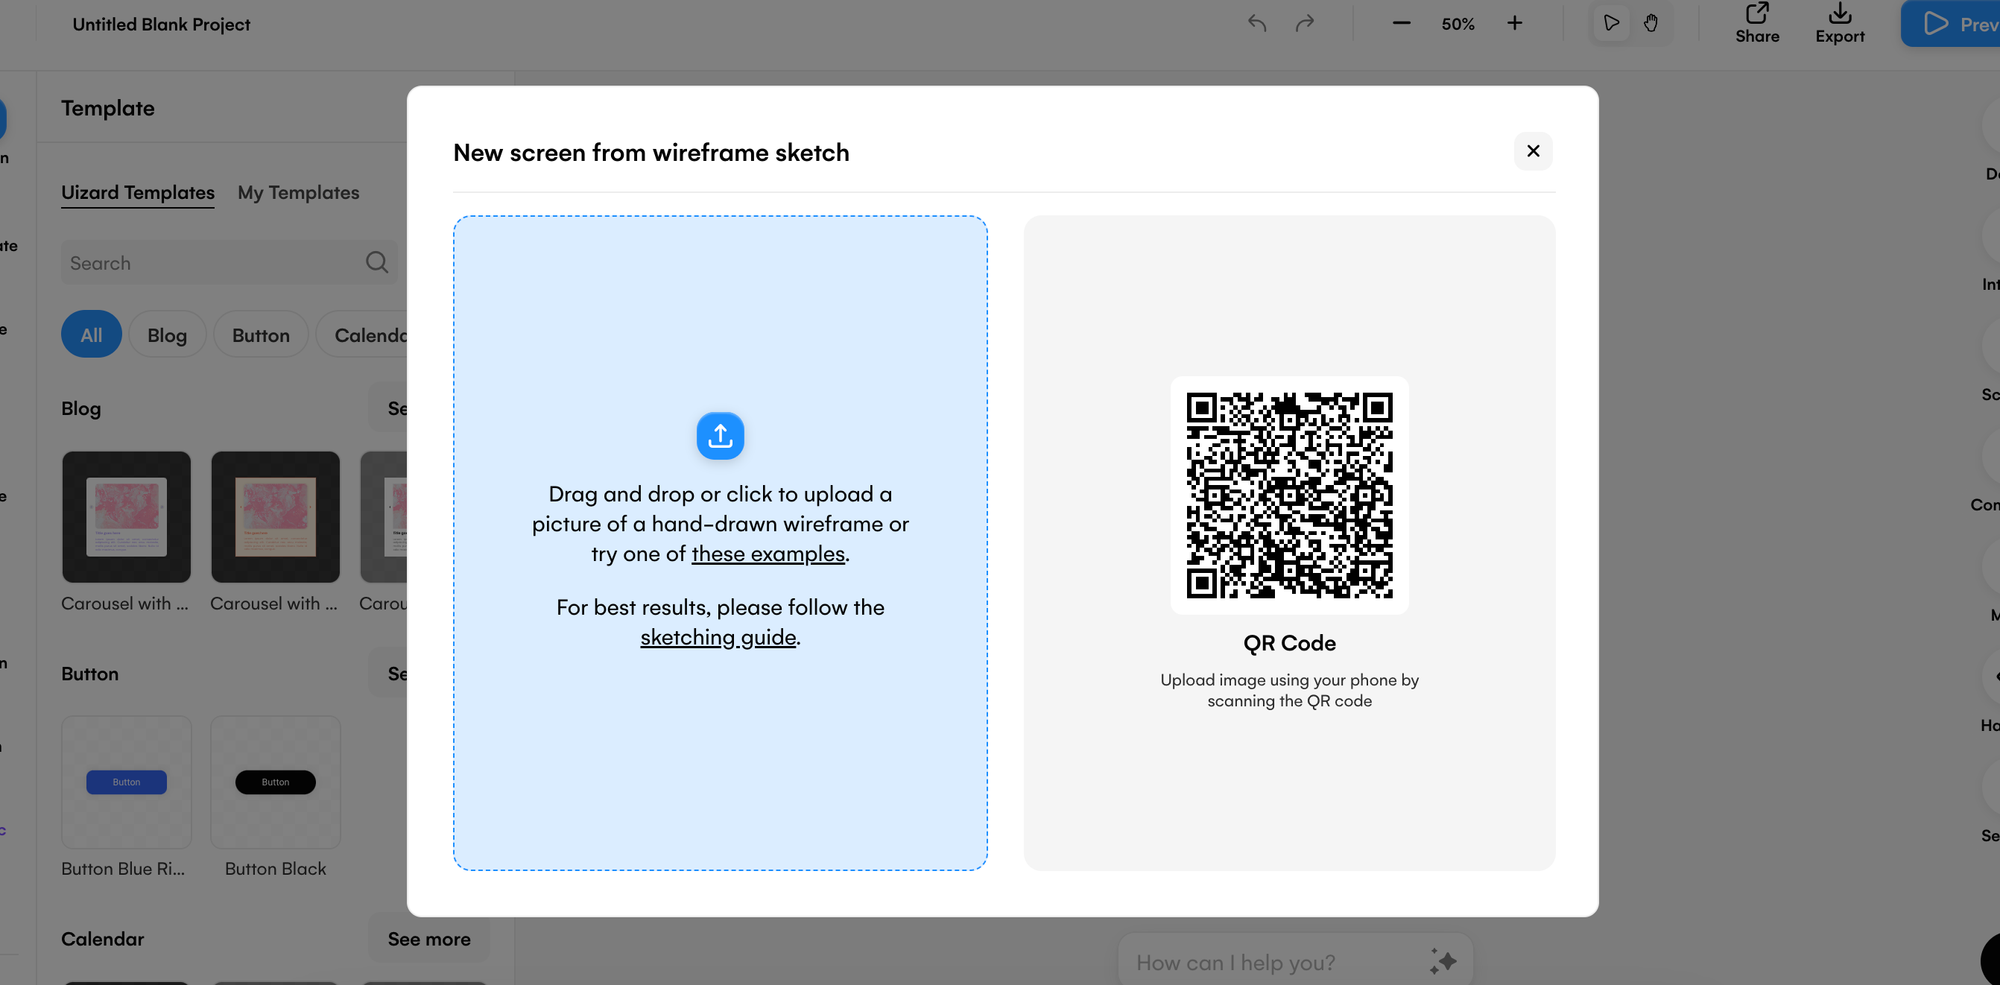
Once you are in the Uizard platform, open up a brand new, blank project. This will ensure that you can start off your project with a hand-drawn wireframe sketch. Under your first design screen, simply select the ‘Scan wireframe sketch’ option.
From here you can drag and drop your wireframe image, click to upload, or scan the QR code to import straight from your phone. From here, Uizard will turn your wireframe image into an editable design screen. If you have multiple wireframe sketches, upload each individual image to add more wireframe screens to your Uizard design.
Once your wireframe image has been imported, it will automatically convert to high-fidelity by default, but you can switch back to low-fidelity by using Wireframe Mode in the magic tab located on the left panel. This converts the polished design back to a simple black-and-white hand-drawn sketch style.
Generally speaking, a wireframe’s level of design fidelity increases with iteration, starting from a sketch and layering on detail as you get more feedback and direction from your team and users. Uizard makes the move from wireframe to stylized mockup to clickable prototype seamless, so you don’t lose any momentum between iterations, making it an ideal tool for rapid prototyping workshops like design sprints.
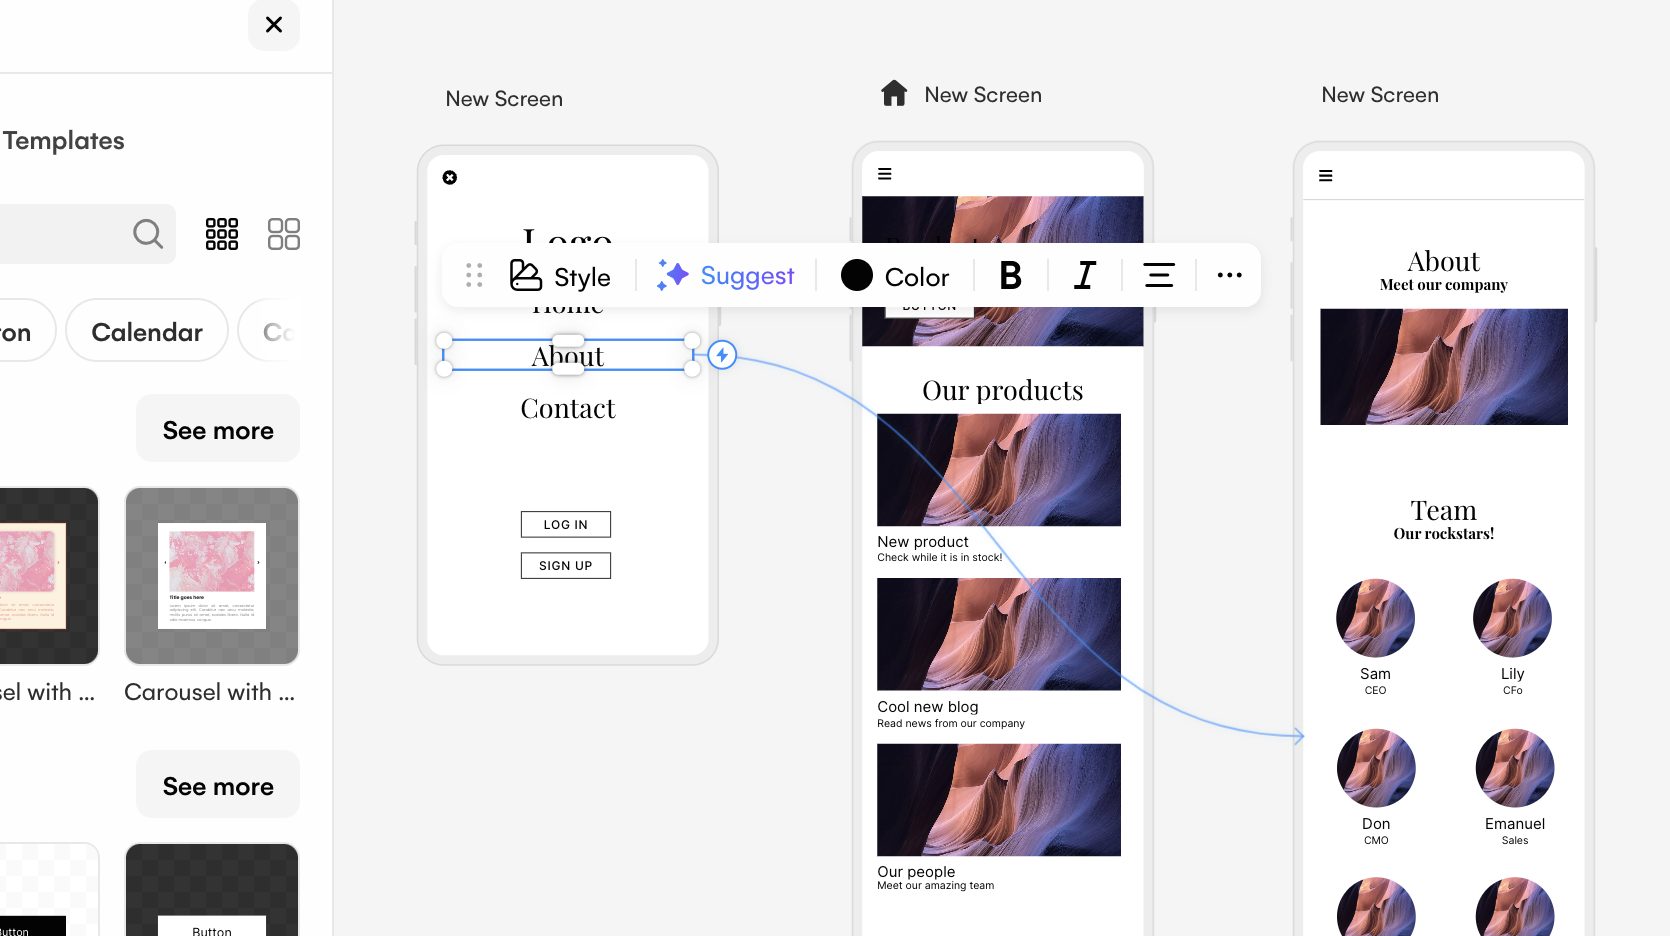
5. Edit your screens
Now you’re ready to start building out your screens. Using the drag and drop editor, you can easily move around your elements and components, or use the left panel to add in new ones to further expand your design screens.
Whether you’ve kept your design in high-fidelity, or converted it back to low-fidelity using wireframe mode, the UI components library will update accordingly. This means, whatever your chosen fidelity is, you can drag-and-drop components in to match. It couldn’t be easier to go from a wireframe sketch to a fully-editable and customizable UI design.
6. Add in your user flows
Take your design to the next level with Uizard’s user flow mapping tool. Whether you want to test the barebones of your design in wireframe mode, or take your mockup to the next level, it couldn’t be easier to map user flow. All you have to do is select an element, and drag the lightning bolt icon to the design screen of your choice. You can then test your user journey via the preview button in the top right corner of the editor. From here, any interactions you have added in you can click through just as a user would.
This is a great way to test the usability of your design before handing it over to a developer.
7. Share and collaborate
Design is a fundamentally collaborative process, and design work is always better as a result of inviting multiple perspectives to the table. Invite your teammates to edit and comment directly in your Uizard project for real-time feedback using the share button in the top right corner. Or, export your design screens, components and elements in multiple formats using Handoff mode, located on the right panel in the editor. Share and develop your design within and outside your organization with Uizard.
Check out the walkthrough below for more information on how to use Uizard Wireframe:
How to add a wireframe screen to an existing project
Whether you have generated a prototype with Autodesigner, designed an app or website from scratch or used a UI template, the process of adding a new wireframe screen is the same. Once you’re in the Uizard editor, head to the magic tab located on the left hand side panel. Here you will find the ‘Wireframe Scanner’, and upon selecting this option you can upload an image of your wireframe sketch. Uizard will then work its magic to add a brand new screen to your existing project, and convert it straight into high-fidelity.

Then all you have to do is edit your wireframe upload to suit the rest of your project.
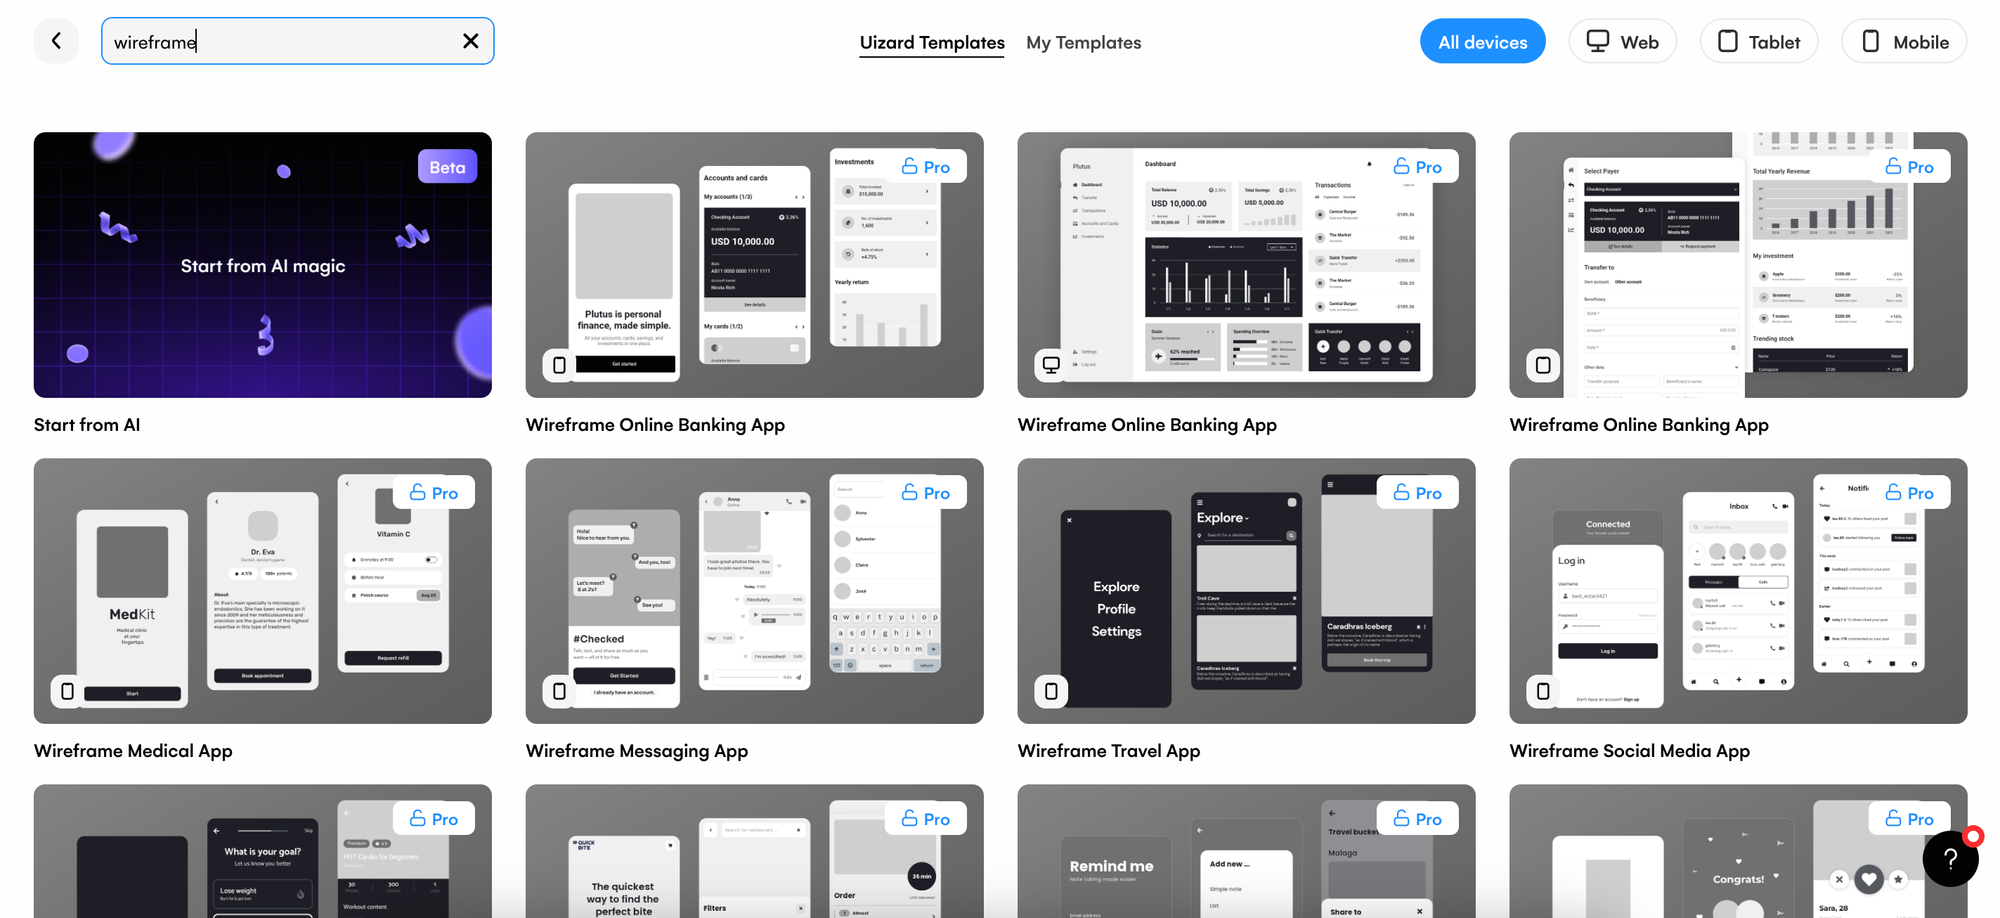
Start with a Uizard wireframe template
An alternative to importing your hand-drawn wireframe sketches is to use a premade set of wireframe screens. Select a wireframe template such as Uizard’s mobile app wireframe template, or the website wireframe template, and create your design from the barebones of a digital wireframe. There are also medium fidelity wireframe templates available to give you a further head start on your design journey, without making design decisions for you.
You can then go ahead and edit the Uizard template to suit the needs of your design project.
Use the UI components library to create a wireframe
In the magic tab on the left panel in the editor, you will find Wireframe Mode. Here, you can switch your design between low and high fidelity. Setting your blank, or existing project, to a low fidelity, will keep your project as a wireframe, and you can then add to or create a new screen from the components in the left panel library. If you are starting with a Uizard wireframe template, Wireframe Mode will already be switched on, and so the components library will appear with wireframe design assets.
To get started, simply sign up to Uizard for free and start building your wireframe in our easy-to-use interface. You can even invite team members, collaborate with stakeholders, and show off your amazing designs to friends with a click of a button!
Uizard is an AI-powered design, prototyping and online wireframing software that supports web and app design projects, all in one place. Sign up for free now and visualize your next big idea with Uizard now.