Website wireframing: A step-by-step guide

Whether you’re a marketer proposing a new design for a client’s website, or a founder brainstorming the next big thing, creating a website wireframe is the appropriate first step to designing a website.
In the creation of digital products, wireframes are usually the starting place for both designers and non-designers. Wireframes can be drawn by hand, or UI design tools, such as Uizard, can be used to create digital, editable versions. Wireframes map out the functionality and user flow of UI designs before the mockup stage, and are a useful first draft to share with clients.
In this article we will discuss the basics of website wireframes, and take you step-by-step through how to create your own wireframe for a website. Interested in finding out more about wireframes? Check out our guide to wireframes to get you up to speed.
Skip to section:
What are wireframes in web design?
What to include in a website wireframe
Why create a website wireframe?
How to make a wireframe for a website
How to create website wireframes in Uizard
What are wireframes in web design?
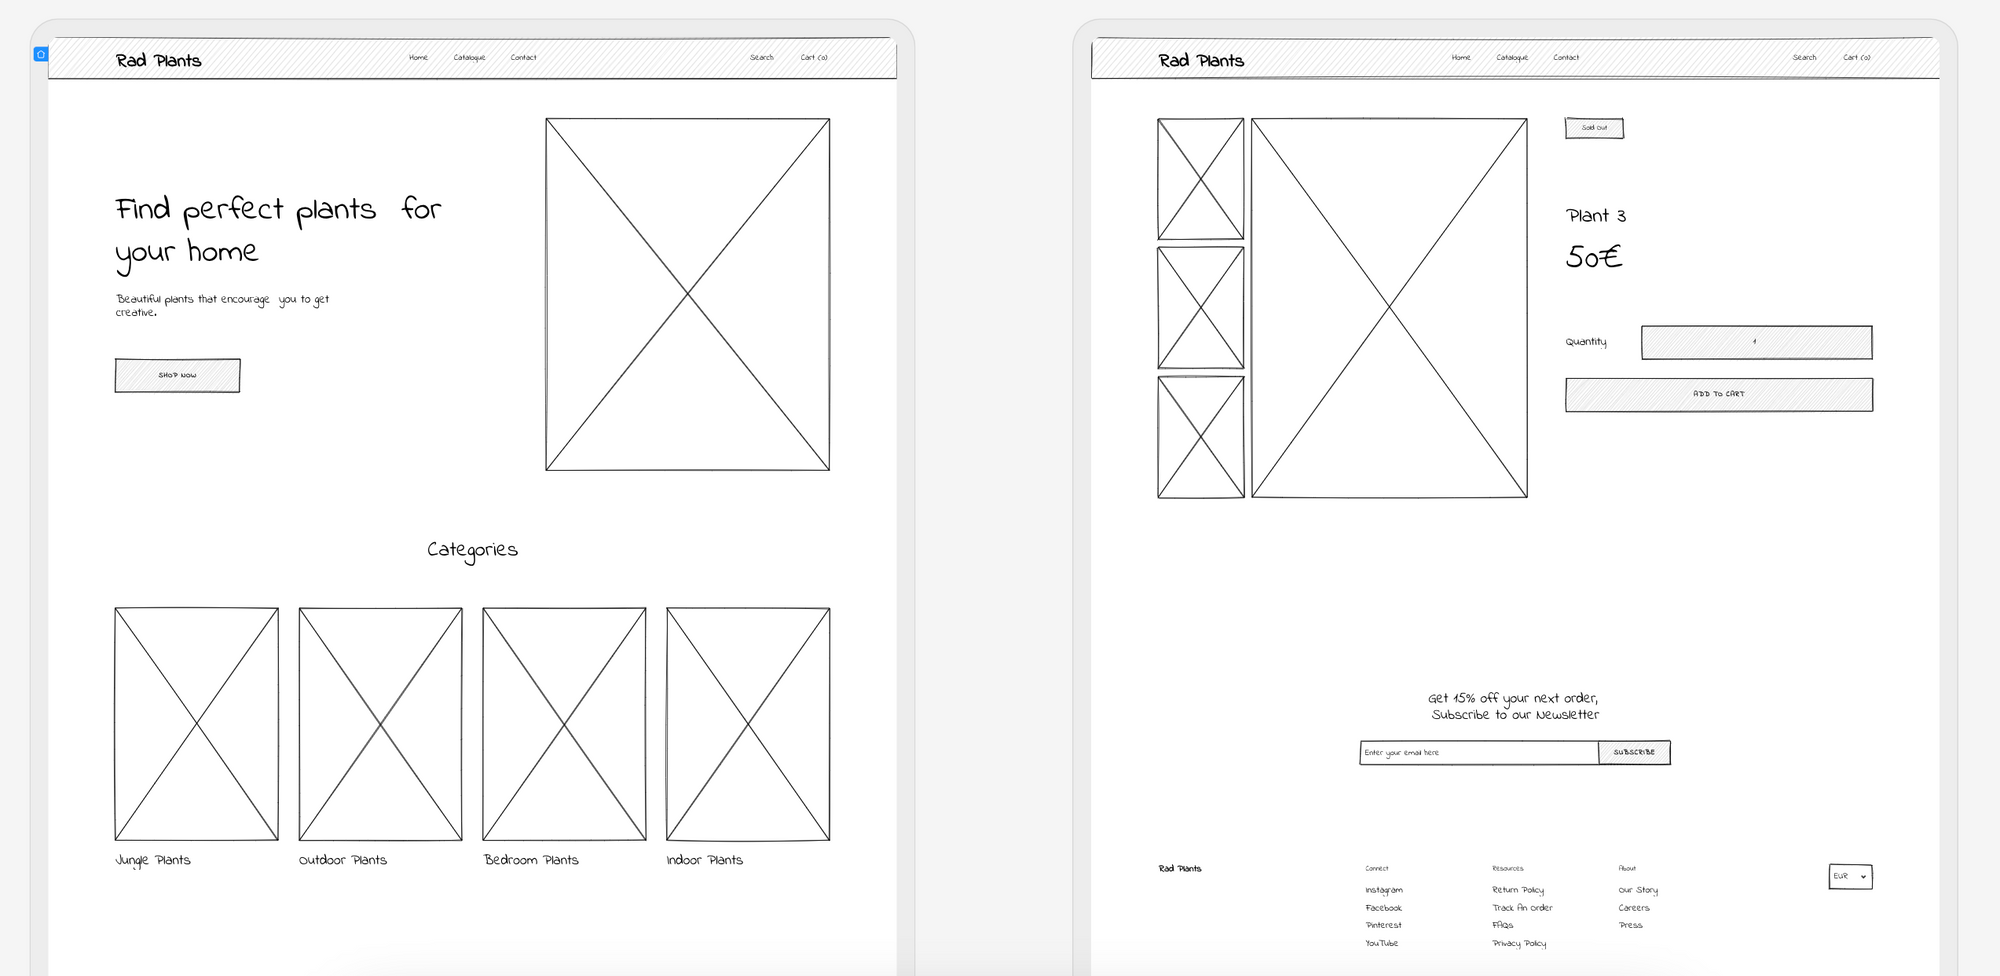
A website wireframe is a hand-drawn, or digitally-drawn, sketch of a website design. A wireframe is used to map out the placement of components and elements within a website design. The visual aspects are left behind within a web wireframe — there is no color, little to no text (only essential headings and subheadings), and images are represented simply as outlines.
The focus of a wireframe for a website is solely on functionality and layout. They present how a user would interact and navigate through a website design, without all of the bells and whistles of a high-fidelity mockup.
What to include in a website wireframe
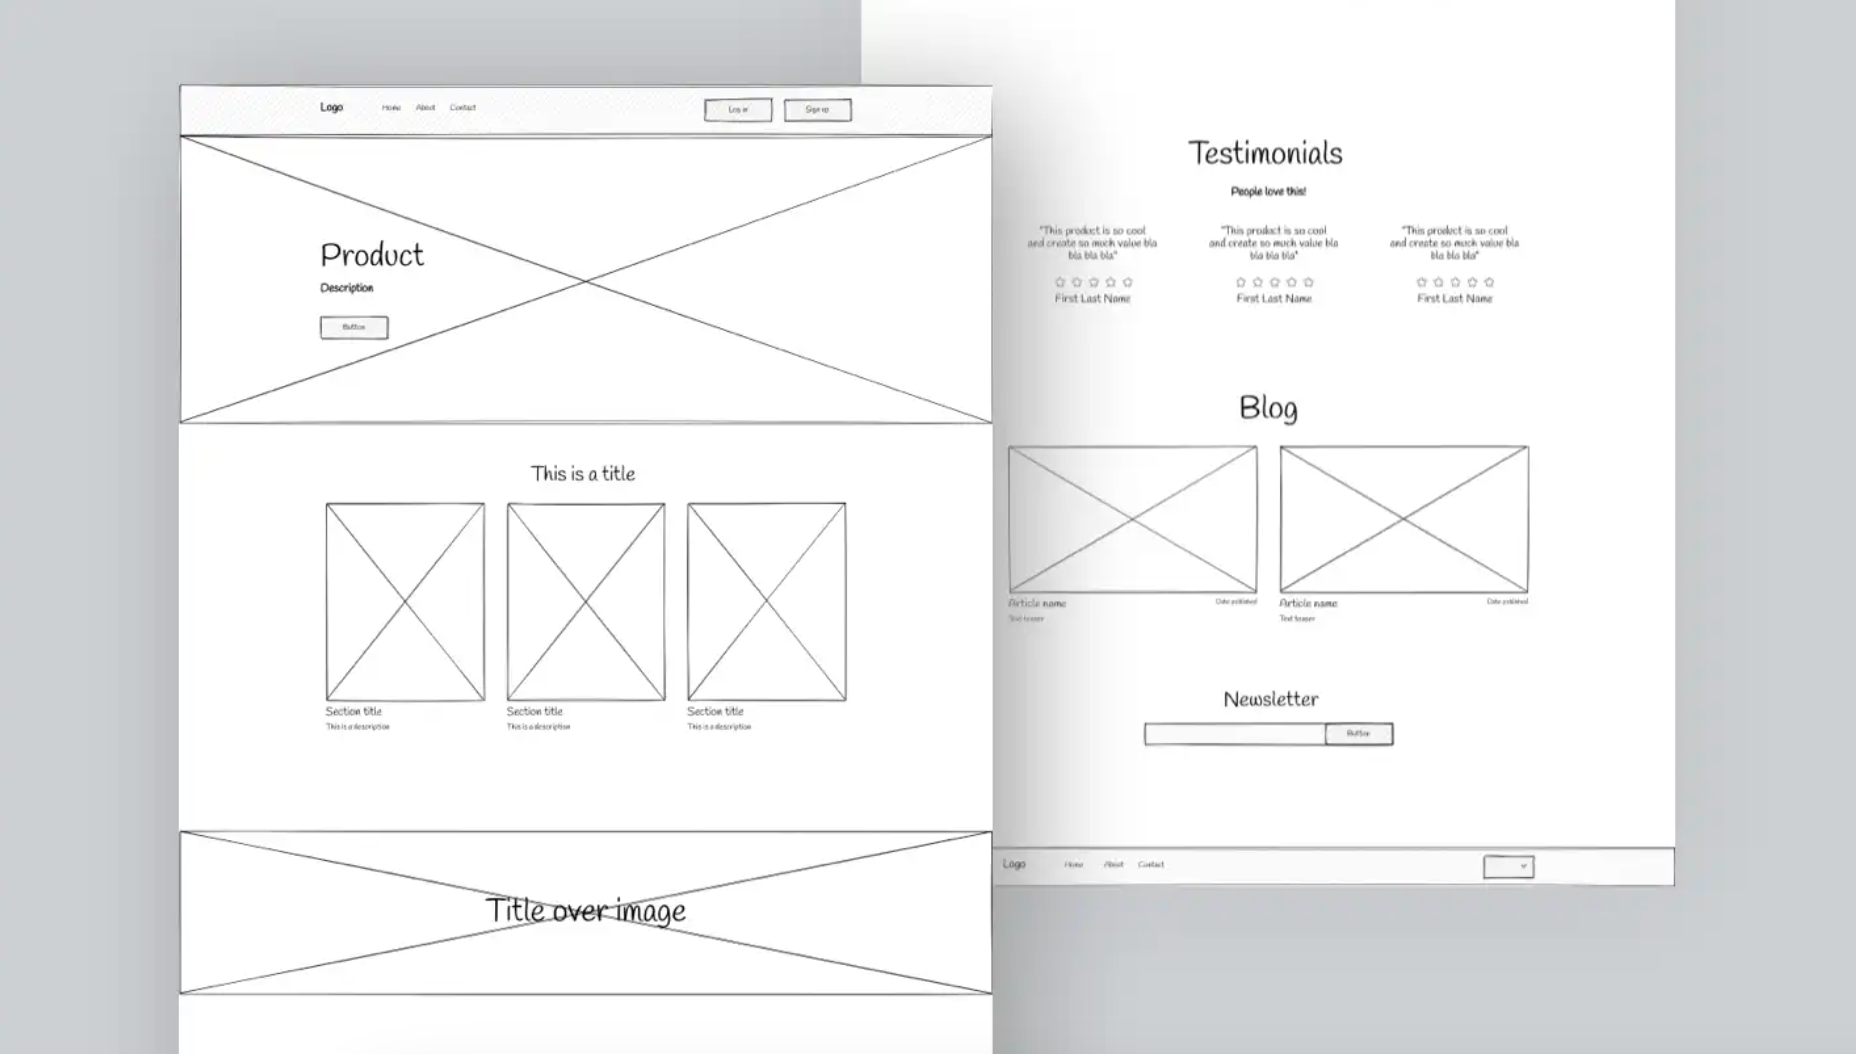
Website wireframing consists of outlines that act as placeholders for web design elements and components. These transform once in the mockup stage, but for now they are kept relatively simple.
When drawing a web wireframe, it’s important to understand what should be included. You will need to include elements such as CTA buttons, images, snippets of text, as well as larger blocks to demonstrate components such as headers and footers within your wireframe. Don’t over complicate your website wireframe with lots of detail, it should be easy to follow, and serve as a rough guideline for when you come to design your web mockup.
Why create a website wireframe?
Building your website design from the bare bones upwards can help to iron out any issues early on. Creating a website wireframe acts as a blueprint for your actual design, it allows you to take a step back, and to view your web design purely from a layout perspective. They’re also a great first draft to give to clients, or to share with other designers for a secondary input.

How to make a wireframe for a website
Ready to get started sketching your website wireframe by hand? Let us run you through the steps you’ll need to follow to produce an amazing set of web design wireframe screens.
- Site architecture: Map out page hierarchies
- Decide on a number of website wireframe screens
- Create a logical web wireframe order
- Add elements and components to your wireframe
- User flow mapping between web wireframe screens
- Share your website wireframe with others
- Upload your hand-drawn website wireframes to Uizard
1. Site architecture: Map out page hierarchies
Before you get started with the actual drawing process of your website wireframe, it’s important to lay down the basics. And this includes the hierarchy of the pages within your web design. Page hierarchy, or site architecture, will impact how a user navigates your site, and how easy it is to do so.
For instance if you had an e-commerce website design, the homepage would sit at the top of the hierarchy, the product category pages would sit below that, and then more specific product subsections below that, and so on. Map out your site architecture first, and then you have a clear line of user flow in place to get started on your web wireframe design.
2. Decide on a number of website wireframe screens
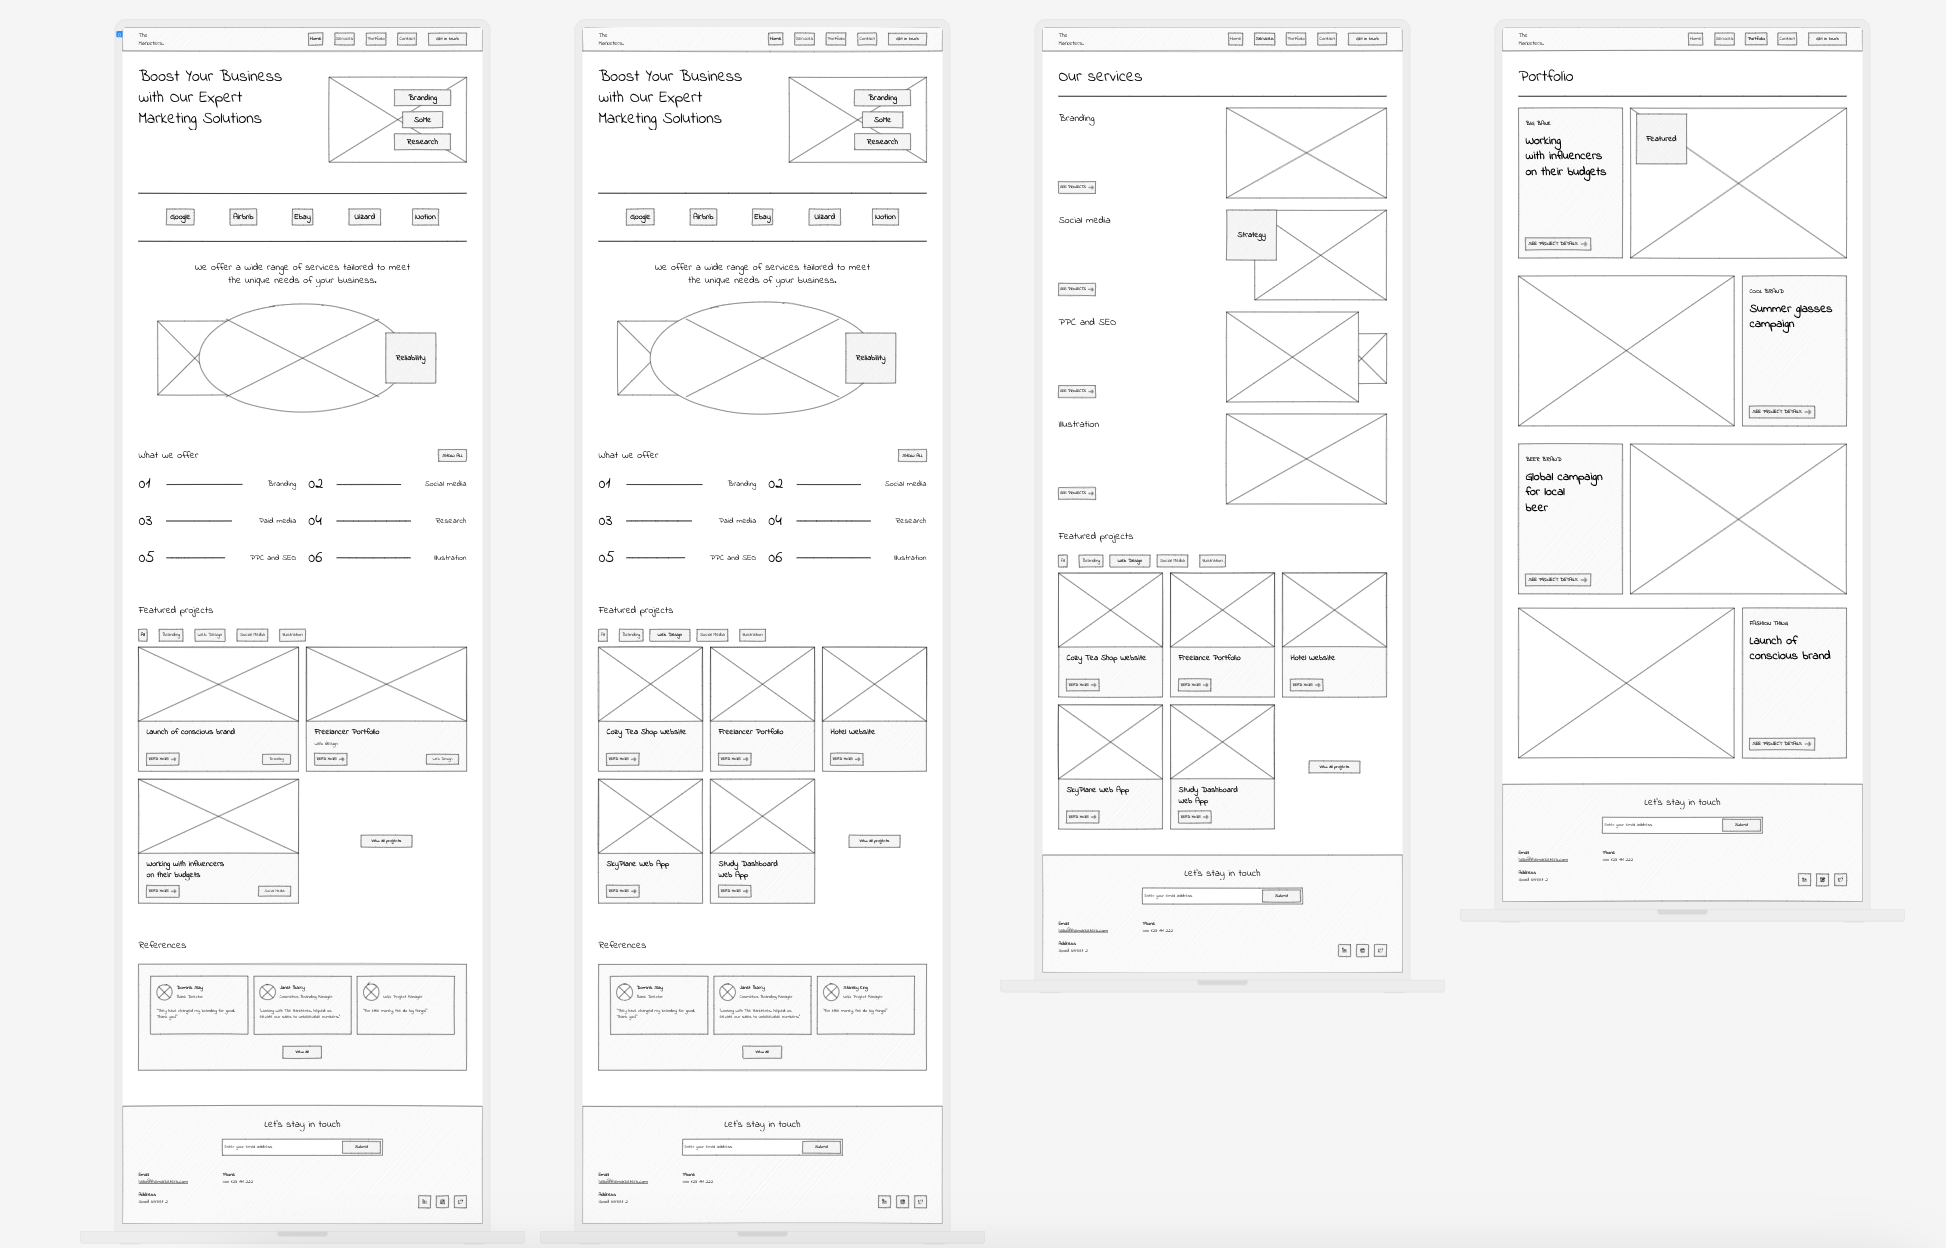
Now that you know your basic website design architecture, it’s time to decide how many website wireframe screens you’re going to need. Using an e-commerce website as an example again, a set of website wireframes may include a homepage, a product category page, a singular product page and then a checkout screen. Something along these lines would be an ideal starting place for your website wireframe.

3. Create a logical web wireframe order
With all of the tedious bits out of the way, now you can get to the fun stuff. In a logical order, sketch out your chosen website wireframe screens. The screens you pick, and the order you choose, will depend on the user journey you are portraying. It’s key to sketch your web wireframe screens in the order a user would click through them, this will provide a better insight into the navigation of your website design.
4. Add elements and components to your website wireframe
Now you have the order of your website wireframes, you will need to decide the types of elements and components that are to be included. Many larger components will remain constant throughout a few of your web wireframe screens, such as headers and footers, but there will be a differentiation in elements such as CTA buttons, text and overall website wireframe layout.
Elements can include:
- Shapes
- Text
- Images
- Icons
- Buttons
Components can include:
- Headers
- Footers
- Cards
- Blog sections
- Gallery sections
- Dialogue sections
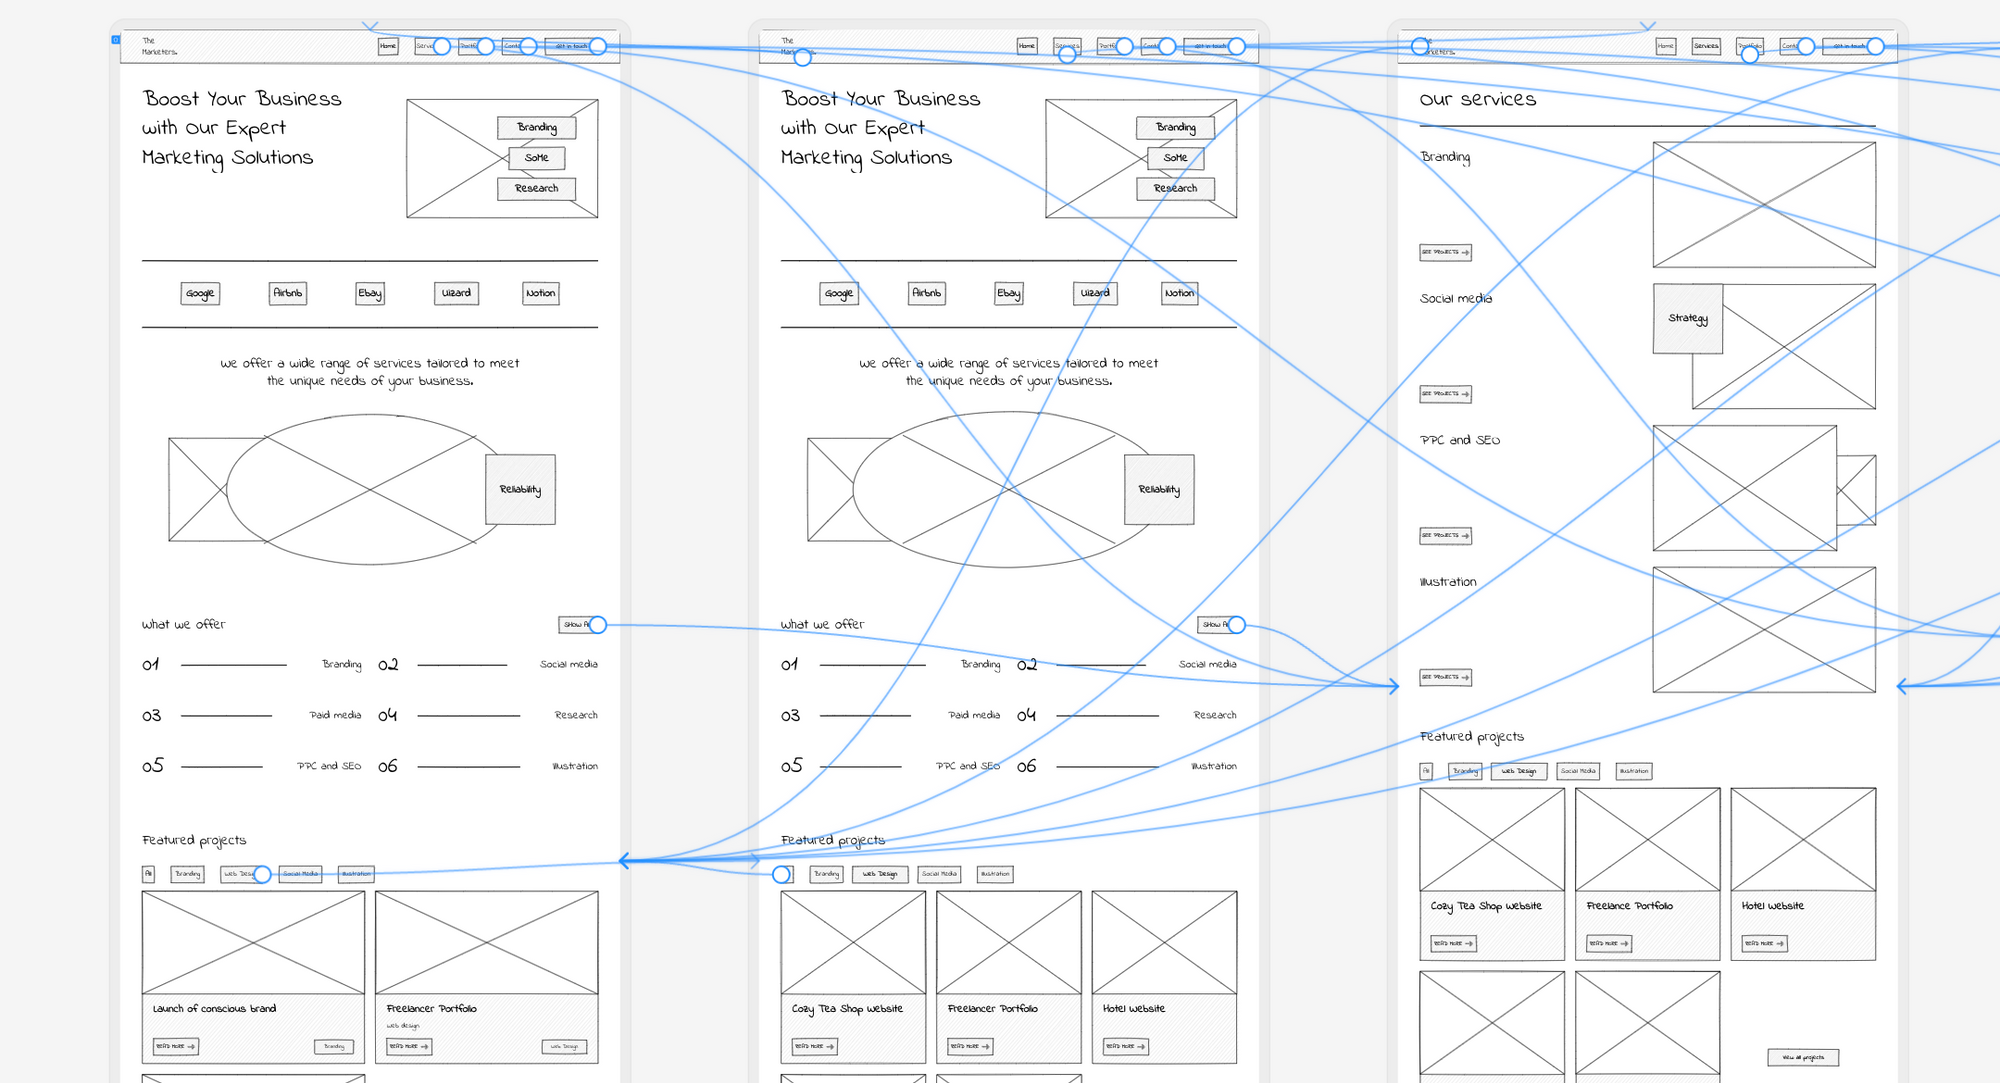
5. User flow mapping between web wireframe screens
Demonstrate how your web wireframes interact with one another by mapping the user flow between screens, and turn your static wireframes into a dynamic wireflow. To do so successfully, consider how a user would travel between screens, and then simply draw lines between the elements and components on one screen, to another.
Wireframing a web design digitally with Uizard allows you to easily link web wireframe screens together. Connect elements such as CTA buttons, and larger header components, to their corresponding pages to demonstrate user flow. Just click the lightning bolt icon to get started.
6. Share your website wireframe with others
With your website wireframes almost complete, you can now look to others for a second opinion on the first stage of your web design. Sharing your wireframe screens with others can help you to spot new opportunities or user flow inconsistencies.
7.Upload your hand-drawn website wireframes to Uizard
Once you have finalized the sketches of your website wireframes, you may be wondering what to do next. Either you could manually make adjustments to your website wireframe design by hand, or you could employ the help of a wireframe design tool such as Uizard.
With Uizard, you can import a picture of your website website wireframe sketch, and turn it into a completely editable website mockup thanks to our Wireframe Scanner. If you want to start a new project by uploading an image of your hand-drawn wireframe, open up a blank project and select the ‘Scan wireframe sketch’ option. Alternatively, to add a new design screen to an existing project, you can do so using the magic tab on the left hand panel. Simply select the Wireframe Scanner option to get started.
Once your website wireframe has been imported, it will automatically transform into a web mockup. Make adjustments to your elements and components, map your user flow, and take your design to the next level.
How to create website wireframes in Uizard
So, how else can you create website wireframes in Uizard? There are several different ways to get your website wireframe project up and running, so let’s run through them.
Generate a website wireframe with Autodesigner
You can generate a low-fidelity wireframe from a text prompt thanks to Autodesigner. Simply enter your prompts, and then use the ‘hand-drawn’ keyword to transform your generation into a low-fidelity website wireframe.

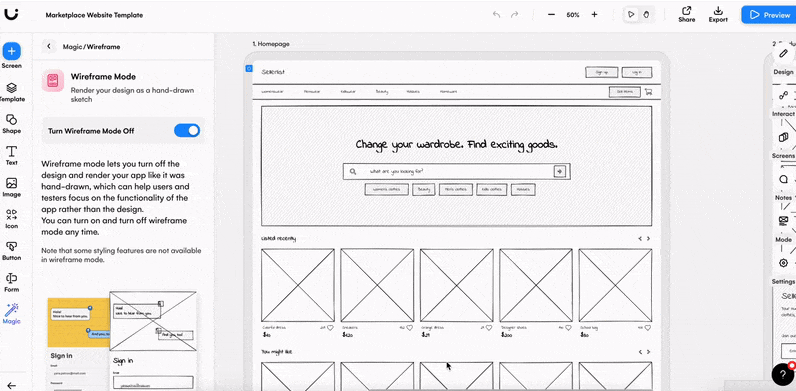
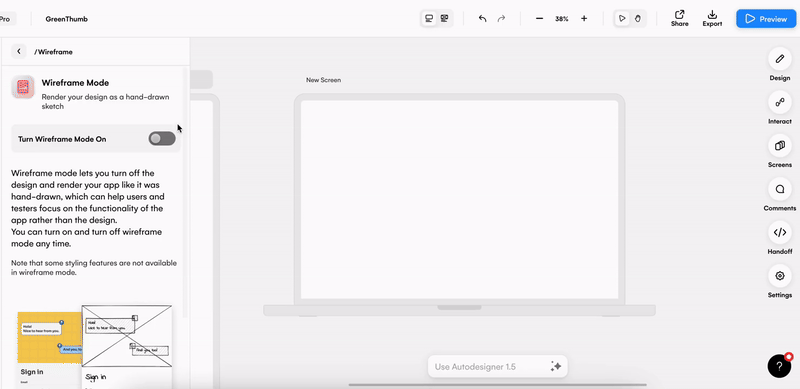
Use wireframe mode to create a website wireframe
You can also create your own digital web wireframe using wireframe mode. All you have to do is locate wireframe mode in the magic tab on the left panel, or at the top of the editor, and then switch it on. This will convert your Uizard web design project from high to low-fidelity. You can then drag-and-drop components from the UI components library to create a new website wireframe screen, or edit your existing design screens in low-fidelity.
Use a premade website wireframe template
If you want a quick and easy way to start a website wireframe digitally, why not try our pre-designed website wireframe template? Our UI templates are equipped with everything you need to get started with your next project, from components and elements to a pre-mapped user flow.
With a wireframing tool, website wireframe creation is easy. So why not sign up today to gain access to our amazing features? If you’re looking for more wireframing knowledge, tips and tricks, check out the articles on our blog.